%20-%20https://sketch.com%20--%3e%3ctitle%3eT-shirts备份%202%3c/title%3e%3cdesc%3eCreated%20with%20Sketch.%3c/desc%3e%3cg%20id='T-shirts备份-2'%20stroke='none'%20stroke-width='1'%20fill='none'%20fill-rule='evenodd'%20transform='translate(0.000000,%201.000000)'%3e%3cg%20id='编组'%20transform='translate(1.000000,%2010.607599)'%20stroke='%23333333'%20stroke-width='2'%3e%3cpath%20d='M24.7506037,2.40561696%20L24.4109858,2.94791681%20C23.1539677,5.92351386%2021.831857,6.92184787%2018.472318,6.92184787%20C15.0918065,6.92184787%2013.7880665,5.90817694%2012.5599904,2.88704991%20C12.3847844,2.4561805%2012.0176189,2.13892356%2011.5768399,2.03613378%20C11.1481647,1.93340907%2010.6944147,2.05271913%2010.3590373,2.35903823%20L2.14473535,9.86550133%20C0.720776712,11.1696549%200.606481197,13.4202167%201.87710556,14.8789444%20L2.07276829,15.0840278%20C2.25830914,15.270309%202.47988147,15.4396542%202.72897579,15.5864188%20L7.32818819,18.2773511%20L7.28090871,18.9005194%20L6.25354816,32.4414343%20C6.21073375,32.9642561%206.44784527,33.473791%206.86639235,33.7641227%20C10.1405412,36.0536646%2013.3721888,37%2018.5296327,37%20C23.6951097,37%2026.9045107,36.0489513%2030.1280064,33.7695522%20L30.283246,33.6433265%20C30.6132328,33.3345129%2030.7846536,32.871259%2030.7355391,32.4039313%20L29.3432358,18.2472635%20L29.9205868,17.9293432%20L34.180155,15.5837978%20C35.172928,15.0358955%2035.8462157,14.0242248%2035.9766588,12.8762784%20C36.1078384,11.7218503%2035.6805042,10.5744842%2034.8363688,9.80961913%20L26.6326031,2.35780292%20C26.2994807,2.05668927%2025.8445706,1.93608725%2025.4144091,2.03482553%20C25.1685409,2.08962871%2024.9357839,2.22011465%2024.7506037,2.40561696%20Z'%20id='路径'%20fill-rule='nonzero'%3e%3c/path%3e%3cpath%20d='M32.0227213,7.12706337%20C34.1435585,6.79908718%2035.5589604,6.0103637%2036.2689268,4.76089296%20C36.7450972,3.92288014%2037.1241904,3.15623869%2037.4062064,2.46096862%20C37.6137918,1.94917626%2038.1969662,1.70257588%2038.7087556,1.91016839%20C38.8174691,1.95426485%2038.9175753,2.01714687%2039.0044951,2.09593814%20L47.0583283,9.39659336%20L47.7193116,10.1076368%20C49.0578159,11.5475138%2048.9756371,13.7998368%2047.5357601,15.1383411%20C47.3875203,15.2761442%2047.2277976,15.4010531%2047.0583283,15.5117097%20L41.9602936,18.3560999%20L43.2627471,32.7848946%20C43.2911962,33.0999871%2043.168856,33.4099546%2042.932878,33.6206843%20C42.6875325,33.8397791%2042.4886172,34.0097554%2042.3361319,34.1306133%20C39.7263264,36.1991123%2036.3979867,37.2333618%2032.3511128,37.2333618%20C28.7945467,37.2333618%2026.1316404,36.9623653%2024.3623939,36.4203724'%20id='路径-2'%20stroke-linecap='round'%3e%3c/path%3e%3c/g%3e%3cpath%20d='M33.4666494,4%20C32.7228105,4%2032.5,6.59294054%2031.8988718,7.11217576%20C31.2977436,7.63141098%2029.4332988,7.40648891%2029.4332988,8.12452017%20C29.4332988,8.84255143%2031.2477079,9.14206726%2031.8988718,9.8748333%20C32.5500357,10.6075994%2032.7509178,13.450957%2033.4666494,13.450957%20C34.182381,13.450957%2034.3969063,10.4640601%2034.8062404,9.8748333%20C35.2155745,9.28560653%2037.2689268,8.78824215%2037.2689268,8.12452017%20C37.2689268,7.46079818%2035.2474011,7.64545819%2034.8062404,7.11217576%20C34.3650797,6.57889333%2034.2104883,4%2033.4666494,4%20Z'%20id='路径-14'%20fill='%23333333'%3e%3c/path%3e%3c/g%3e%3c/svg%3e)
'%20stroke-linejoin='round'%3e%3cg%20id='编组'%20transform='translate(9.000000,%207.000000)'%20fill-rule='nonzero'%20stroke='%23333333'%20stroke-width='2'%3e%3cpath%20d='M31.6580999,-0.102439008%20C30.5100269,2.18823585%2030.0542426,5.67474993%2030.3587763,9.42418424%20C30.6822663,13.3951973%2031.8077846,17.2494259%2033.4717621,19.9872374%20L33.4717621,19.9872374%20L33.4717621,40.5126294%20L-1,40.5126294%20L-1,19.9934791%20C0.658093371,17.2553578%201.78946921,13.4009517%202.11296635,9.42985083%20C2.41752353,5.68012736%201.96173463,2.19367658%200.813663539,-0.0970116329%20L0.813663539,-0.0970116329%20L8.12511393,-0.0970116329%20C7.93029031,2.82458939%208.80601437,5.51057742%2010.5050219,7.35259165%20C11.911224,8.87715484%2013.8817335,9.80794816%2016.2358811,9.80794816%20C18.5896257,9.80794816%2020.5597831,8.8761884%2021.9658812,7.35090274%20C23.6654197,5.50730309%2024.5415191,2.81937778%2024.3466448,-0.102439008%20L24.3466448,-0.102439008%20Z'%20id='路径'%3e%3c/path%3e%3cline%20x1='0'%20y1='35.5434153'%20x2='33.3493773'%20y2='35.5434153'%20id='路径-5'%3e%3c/line%3e%3cpath%20d='M7.02092154,-7.10542736e-15%20C10.1319066,2.93766424%2013.2035597,4.40649636%2016.2358811,4.40649636%20C19.2682024,4.40649636%2022.2974375,2.93766424%2025.3235864,-7.10542736e-15'%20id='路径-7'%20stroke-linecap='round'%3e%3c/path%3e%3cpath%20d='M31.4953977,2.63284558%20L36.4771799,2.61608223%20C35.6927912,8.39179041%2036.7632888,14.5260803%2039.6886728,21.018952%20L39.6886728,39.4218217%20L34.3249871,39.4218217'%20id='路径-9'%20stroke-linecap='round'%3e%3c/path%3e%3c/g%3e%3c/g%3e%3c/svg%3e)
'%3e%3cpath%20d='M19.7354789,3.20880828%20C19.7605297,5.17861174%2020.6448662,6.94071017%2022.0295594,8.13965347%20C23.1932709,9.14725872%2024.711067,9.75671011%2026.3711606,9.75671011%20C28.0312542,9.75671011%2029.5490503,9.14725872%2030.7127618,8.13965347%20C31.8921595,7.11846622%2032.7085685,5.68873246%2032.9402054,4.07008582%20C32.9791132,3.79820377%2033.0006898,3.52681041%2033.0059749,3.25726284%20C33.3088406,3.22718757%2033.6170537,3.21177646%2033.9300294,3.21174794%20C36.1624168,3.21154457%2038.1526409,3.99399935%2039.6884369,5.29843532%20C41.2675336,6.63964892%2042.3676941,8.53665197%2042.7454691,10.7166588%20L42.7454691,10.7166588%20L46.1709196,41.7693318%20C46.247944,42.3321697%2046.0859691,42.8829051%2045.7084154,43.3183964%20C45.3612167,43.722187%2044.8663578,43.9753491%2044.3260734,44.0229386%20L44.3260734,44.0229386%20L39.8040277,44.0310553%20C39.3781173,44.0310553%2038.9829429,43.8965525%2038.6635982,43.6700095%20C38.3024986,43.4138456%2038.038002,43.0403296%2037.9249985,42.6039024%20L37.9249985,42.6039024%20L37.6832738,41.0277321%20C37.0157385,42.0213966%2035.9570908,42.6391292%2034.7706802,42.7062063%20L34.7706802,42.7062063%20L16.8781526,42.7122292%20C15.6665116,42.7122292%2014.5474319,42.1274244%2013.8744406,41.1564779%20L13.8744406,41.1564779%20L13.5787457,42.5263987%20C13.4931715,42.9254624%2013.2806044,43.2768413%2012.9822705,43.540301%20C12.6774394,43.8094984%2012.2828471,43.9856112%2011.8527165,44.0228058%20L11.8527165,44.0228058%20L7.2966742,44.0301767%20C6.68507413,44.0301767%206.11615304,43.7675926%205.72859965,43.3188465%20C5.38697876,42.9229494%205.22291954,42.434758%205.24956026,41.9304278%20L5.24956026,41.9304278%20L9.114459,10.9787644%20C9.43354023,8.78714507%2010.4574643,6.866184%2011.9617204,5.48365114%20C13.439357,4.12558378%2015.381771,3.28220853%2017.5931807,3.21561749%20L17.5931807,3.21561749%20Z'%20id='形状结合'%20stroke='%23333333'%20stroke-width='2'%20stroke-linejoin='round'%20fill-rule='nonzero'%3e%3c/path%3e%3cline%20x1='14.9471931'%20y1='16.0295055'%20x2='13.8670819'%20y2='43.1333598'%20id='路径-2'%20stroke='%23333333'%20stroke-width='2'%20stroke-linejoin='round'%20fill-rule='nonzero'%3e%3c/line%3e%3cline%20x1='37.6587671'%20y1='16.0295055'%20x2='36.567858'%20y2='43.1333598'%20id='路径-2备份'%20stroke='%23333333'%20stroke-width='2'%20stroke-linejoin='round'%20fill-rule='nonzero'%20transform='translate(37.113313,%2029.581433)%20scale(-1,%201)%20translate(-37.113313,%20-29.581433)%20'%3e%3c/line%3e%3cpath%20d='M4.14236007,0%20C3.37841745,0%203.14958501,2.66302001%202.53221008,3.19628862%20C1.91483515,3.72955722%200,3.49855617%200,4.23599369%20C0,4.9734312%201.86344714,5.28104205%202.53221008,6.03361258%20C3.20097302,6.78618312%203.4072844,9.70638822%204.14236007,9.70638822%20C4.87743575,9.70638822%205.09775907,6.6387644%205.51815625,6.03361258%20C5.93855342,5.42846076%208.04740171,4.9176541%208.04740171,4.23599369%20C8.04740171,3.55433327%205.97124022,3.74398409%205.51815625,3.19628862%20C5.06507227,2.64859315%204.9063027,0%204.14236007,0%20Z'%20id='路径-14'%20fill='%23333333'%3e%3c/path%3e%3cline%20x1='6.44444444'%20y1='38.3089431'%20x2='13.2552553'%20y2='38.3089431'%20id='路径-3'%20stroke='%23333333'%20stroke-width='2'%20stroke-linejoin='round'%20fill-rule='nonzero'%3e%3c/line%3e%3cline%20x1='38'%20y1='38.3089431'%20x2='45.8108108'%20y2='38.3089431'%20id='路径-3备份'%20stroke='%23333333'%20stroke-width='2'%20stroke-linejoin='round'%20fill-rule='nonzero'%3e%3c/line%3e%3c/g%3e%3c/g%3e%3c/svg%3e)
'%3e%3cpath%20d='M34.9261439,0%20C34.1622012,0%2033.9333688,2.66302001%2033.3159939,3.19628862%20C32.6986189,3.72955722%2030.7837838,3.49855617%2030.7837838,4.23599369%20C30.7837838,4.9734312%2032.6472309,5.28104205%2033.3159939,6.03361258%20C33.9847568,6.78618312%2034.1910682,9.70638822%2034.9261439,9.70638822%20C35.6612195,9.70638822%2035.8815429,6.6387644%2036.30194,6.03361258%20C36.7223372,5.42846076%2038.8311855,4.9176541%2038.8311855,4.23599369%20C38.8311855,3.55433327%2036.755024,3.74398409%2036.30194,3.19628862%20C35.8488561,2.64859315%2035.6900865,0%2034.9261439,0%20Z'%20id='路径-14'%20fill='%23333333'%3e%3c/path%3e%3cpath%20d='M18.4864865,7.18963854%20C15.4758095,7.17353458%2011.6765338,8.43151301%209.29444611,11.1321905%20C6.91235846,13.832868%201.25126095,20.2672047%200.387510052,31.5103084%20C-0.188323879,39.0057108%20-0.122397588,42.4815693%200.585288924,41.9378837%20L5.35517862,43.1351351%20C6.49874742,42.6940382%207.11008428,41.3246688%207.18918919,39.027027%20C10.964873,40.352122%2014.7306388,40.9373335%2018.4864865,40.7826614%20C22.2423342,40.6279893%2026.0080999,40.0943847%2029.7837838,39.1818475%20C30.1353835,41.4550539%2030.9437088,42.7728164%2032.2087597,43.1351351%20L35.97522,42.1868999%20C37.082045,41.6368999%2037.2680046,38.0780361%2036.5330988,31.5103084%20C35.4307401,21.6587169%2030.3374081,13.8085547%2027.6629466,11.1321905%20C24.9884851,8.45582629%2021.4971635,7.2057425%2018.4864865,7.18963854%20Z'%20id='路径-2'%20stroke='%23333333'%20stroke-width='2'%20stroke-linejoin='round'%20fill-rule='nonzero'%3e%3c/path%3e%3cpath%20d='M30.4824021,39.027027%20C29.7361521,36.2882883%2029.7873366,33.5495495%2030.6359556,30.8108108'%20id='路径-4'%20stroke='%23333333'%20stroke-width='2'%20stroke-linecap='round'%20stroke-linejoin='round'%20fill-rule='nonzero'%20transform='translate(30.297297,%2034.918919)%20scale(-1,%201)%20translate(-30.297297,%20-34.918919)%20'%3e%3c/path%3e%3cpath%20d='M18.5081607,1.02702703%20C23.5904804,1.02702703%2028.8837764,7.80750772%2027.5089127,10.5572351%20C26.1340491,13.3069625%2011.044553,13.6315238%209.50740862,10.5572351%20C7.97026429,7.48294643%2013.4258409,1.02702703%2018.5081607,1.02702703%20Z'%20id='矩形'%20stroke='%23333333'%20stroke-width='2'%20stroke-linejoin='round'%20fill-rule='nonzero'%3e%3c/path%3e%3cpath%20d='M14.2487482,28.9937363%20C14.9334329,27.7204903%2015.1527269,26.6144701%2014.9066303,25.6756757%20L22.1744145,25.6756757%20C22.1611041,26.952086%2022.3983129,28.0581062%2022.8860409,28.9937363%20C23.3737689,29.9293664%2024.1722123,30.8774003%2025.2813711,31.8378378%20L24.6486486,35.9459459%20C22.5945946,36.4426461%2020.5405405,36.6909962%2018.4864865,36.6909962%20C16.4324324,36.6909962%2014.3783784,36.4426461%2012.3243243,35.9459459%20L11.6895463,31.8378378%20C12.7109962,31.2150162%2013.5640635,30.2669823%2014.2487482,28.9937363%20Z'%20id='矩形'%20stroke='%23333333'%20stroke-width='2'%20stroke-linecap='round'%20stroke-linejoin='round'%20fill-rule='nonzero'%3e%3c/path%3e%3cpath%20d='M6.8607805,39.027027%20C6.11453049,36.2882883%206.16571499,33.5495495%207.014334,30.8108108'%20id='路径-4'%20stroke='%23333333'%20stroke-width='2'%20stroke-linecap='round'%20stroke-linejoin='round'%20fill-rule='nonzero'%3e%3c/path%3e%3c/g%3e%3c/g%3e%3c/svg%3e)
'%20fill-rule='nonzero'%20stroke='%23333333'%20stroke-width='2'%3e%3cpath%20d='M30.2050905,-0.0716765239%20C30.6708724,-0.020568619%2031.0989537,0.0686601335%2031.483746,0.196177499%20C33.6750695,0.92236607%2036.250887,3.48295379%2038.4018553,7.23671243%20C40.2937276,10.5383101%2041.8772238,14.7414509%2042.6174967,19.2400665%20C43.3015193,23.3968505%2043.7565804,28.9686602%2043.9784178,35.9547829%20C44.0400516,36.4969187%2043.8781366,37.0250522%2043.5140054,37.4450611%20C43.2062203,37.8030139%2042.7813981,38.041594%2042.3119771,38.1218049%20L42.3119771,38.1218049%20L37.9607078,39.444336%20C37.4726975,39.4862166%2037.0161903,39.348771%2036.6566164,39.0936894%20C36.3026307,38.8425722%2036.0422434,38.4777692%2035.9279386,38.0514231%20L35.9279386,38.0514231%20L35.6512065,36.5336709%20C35.0300844,37.3677575%2030.555744,39.4518537%2024.4058776,39.4509091%20C18.2992611,39.4499711%2014.4288377,37.4473381%2013.778979,36.6481801%20L13.778979,36.6481801%20L13.4946346,37.9590944%20C13.409733,38.3550217%2013.1988587,38.7036554%2012.9028653,38.9650483%20C12.5531444,39.2738881%2012.0843057,39.4592101%2011.5795724,39.4506141%20L11.5795724,39.4506141%20L6.83733744,37.7838851%20C6.30688108,37.734067%205.8219314,37.4841832%205.47966262,37.0878719%20C5.10475105,36.6533949%204.94361938,36.1075601%205.01987087,35.5487108%20C5.87952927,27.1575901%206.62275357,21.5194236%207.24381867,18.6331488%20C8.15689051,14.3898316%2010.0567274,9.62710944%2012.2478489,6.01913378%20C14.4198269,2.44268049%2016.9155321,0.126020223%2019.0038476,-0.0341941814%20C19.3349904,-0.059599273%2019.684528,-0.0329792934%2020.048933,0.0426727475%20C20.0485026,0.322038007%2020.0587709,0.606972386%2020.0781127,0.89613626%20C20.1906468,2.57854425%2020.5885245,4.07814763%2021.5538567,5.09082243%20C22.3562527,5.93257014%2023.5496125,6.39100896%2025.2079599,6.39100896%20C26.8232274,6.39100896%2027.9750703,5.95750793%2028.7455387,5.15028431%20C29.680592,4.17062417%2030.0530617,2.7130328%2030.1717874,1.07319992%20C30.200092,0.68225832%2030.2126331,0.299489175%2030.2050905,-0.0716765239%20Z'%20id='形状结合'%3e%3c/path%3e%3cpath%20d='M19.5133106,0%20C21.3811567,1.7116825%2022.6015035,2.13363743%2025.1288966,2.13363743%20C27.6562896,2.13363743%2028.7112206,1.7116825%2031.0265736,0'%20id='路径-7'%20stroke-linecap='round'%3e%3c/path%3e%3cpath%20d='M14.2776845,37.1340996%20C13.4265244,34.2247524%2013.6221502,31.1532826%2014.63166,28.1550842'%20id='路径-4'%20stroke-linecap='round'%3e%3c/path%3e%3cpath%20d='M35.6114473,37.1340996%20C34.7602872,34.2247524%2034.955913,31.1532826%2035.9654228,28.1550842'%20id='路径-4备份'%20stroke-linecap='round'%20transform='translate(35.520490,%2032.644592)%20scale(-1,%201)%20translate(-35.520490,%20-32.644592)%20'%3e%3c/path%3e%3cpath%20d='M15.6089327,1.73235424%20C14.8279907,1.73235424%2013.5856023,1.15490283%2011.8817673,-5.68434189e-14%20C5.88636871,6.20145775%202.28312945,13.1925875%201.07204948,20.9733893%20C-0.139030491,28.754191%20-0.190632326,32.961664%200.917243972,33.5958082%20L4.99556447,35.210175'%20id='路径-2'%20stroke-linecap='round'%3e%3c/path%3e%3c/g%3e%3cpath%20d='M25.5592019,34.3180607%20C26.2438866,33.0448147%2026.4631806,31.9387944%2026.217084,31%20L33.4848682,31%20C33.4715578,32.2764103%2033.7087666,33.3824305%2034.1964946,34.3180607%20C34.6842225,35.2536908%2035.4826659,36.2017246%2036.5918248,37.1621622%20L35.9591023,41.2702703%20C33.9050483,41.7669705%2031.8509942,42.0153206%2029.7969402,42.0153206%20C27.7428861,42.0153206%2025.6888321,41.7669705%2023.634778,41.2702703%20L23,37.1621622%20C24.0214499,36.5393405%2024.8745172,35.5913066%2025.5592019,34.3180607%20Z'%20id='矩形'%20stroke='%23333333'%20stroke-width='2'%20stroke-linecap='round'%20fill-rule='nonzero'%3e%3c/path%3e%3c/g%3e%3c/svg%3e)
'%20fill-rule='nonzero'%20stroke='%23333333'%20stroke-linejoin='round'%20stroke-width='2'%3e%3cpath%20d='M23.9621848,47.8189278%20C23.5302392,47.8189278%2023.1846827,47.5165659%2023.0982935,47.0846203%20L19.2107828,24.2778909%20L15.3232721,47.0846203%20C15.236883,47.5165659%2014.8913265,47.8189278%2014.4593809,47.8189278%20L1.26379866,47.8189278%20C1.00463128,47.8189278%200.788658489,47.7325387%200.615880175,47.5165659%20C0.44310192,47.3437877%200.356712793,47.0846203%200.399907386,46.8254529%20C1.6957443,32.7872199%204.15783439,5.79061781%204.15783439,4.23561352%20L4.15783439,3.5445005%20L4.15783439,1.29838325%20C4.15783439,0.823243081%204.54658544,0.434491979%205.02172561,0.434491979%20L33.8629155,0.434491979%20C34.3380556,0.434491979%2034.7268067,0.823243022%2034.7268067,1.29838325%20L34.7268067,4.14922439%20C35.4611143,9.4189611%2038.35515,45.3136432%2038.4847338,46.8254529%20C38.4847338,47.0846203%2038.4415392,47.3005931%2038.2687609,47.5165659%20C38.0959826,47.6893442%2037.8800099,47.8189278%2037.6208425,47.8189278%20L23.9621848,47.8189278%20Z'%20id='路径'%3e%3c/path%3e%3cpath%20d='M12.2091913,7.64705882%20C13.2588301,14.6696078%2010.1386094,18.1808824%202.84852941,18.1808824'%20id='路径-8'%3e%3c/path%3e%3cpath%20d='M36.6606619,7.64705882%20C37.7103006,14.6696078%2034.59008,18.1808824%2027.3,18.1808824'%20id='路径-8备份'%20transform='translate(32.079412,%2012.913971)%20scale(-1,%201)%20translate(-32.079412,%20-12.913971)%20'%3e%3c/path%3e%3cline%20x1='4.36015661'%20y1='6.85020053'%20x2='35.4250589'%20y2='6.85020053'%20id='路径-7'%3e%3c/line%3e%3cline%20x1='22.9411765'%20y1='43.0147059'%20x2='38.2352941'%20y2='43.0147059'%20id='路径-3备份'%3e%3c/line%3e%3cline%20x1='0.955882353'%20y1='43.0147059'%20x2='16.25'%20y2='43.0147059'%20id='路径-3备份-2'%3e%3c/line%3e%3c/g%3e%3cpath%20d='M6.14236007,5%20C5.37841745,5%205.14958501,7.66302001%204.53221008,8.19628862%20C3.91483515,8.72955722%202,8.49855617%202,9.23599369%20C2,9.9734312%203.86344714,10.281042%204.53221008,11.0336126%20C5.20097302,11.7861831%205.4072844,14.7063882%206.14236007,14.7063882%20C6.87743575,14.7063882%207.09775907,11.6387644%207.51815625,11.0336126%20C7.93855342,10.4284608%2010.0474017,9.9176541%2010.0474017,9.23599369%20C10.0474017,8.55433327%207.97124022,8.74398409%207.51815625,8.19628862%20C7.06507227,7.64859315%206.9063027,5%206.14236007,5%20Z'%20id='路径-14'%20fill='%23333333'%3e%3c/path%3e%3c/g%3e%3c/svg%3e)
'%20fill-rule='nonzero'%20stroke='%23333333'%20stroke-width='2'%3e%3cpath%20d='M33.0403779,3.78231646%20C33.3707049,3.78231646%2033.6611649,4.12340341%2033.7295084,4.6094523%20C33.9402343,6.02496304%2034.1224837,11.3518882%2034.3104284,12.7759262%20L34.3104284,12.7759262%20L34.2695566,12.7765763%20C35.9295803,22.1661353%2036.8219297,30.5371284%2036.5177248,40.2716845%20L36.5177248,40.2716845%20L36.4949436,41.0291585%20L20.6164655,41.0291585%20L18.3311855,27.8254864%20C18.2913184,27.546417%2017.8926479,27.546417%2017.8527808,27.8254864%20L17.8527808,27.8254864%20L16.0602308,41.0291585%20L0.181752703,41.0291585%20L0.158971523,40.2716845%20C-0.146886806,30.6582401%200.297947405,22.3663342%201.86201358,13.1114332%20L1.91967082,12.7759262%20C2.10761547,11.3518882%202.28986491,6.02496304%202.50059073,4.6094523%20C2.57462954,4.12340341%202.85939423,3.78231646%203.18972123,3.78231646%20L3.18972123,3.78231646%20Z'%20id='形状结合'%3e%3c/path%3e%3cpath%20d='M9.07993884,12.1521737%20C10.0037613,17.7608692%207.25754983,20.5652169%200.841304326,20.5652169'%20id='路径-8'%3e%3c/path%3e%3cpath%20d='M35.1603729,12.1521737%20C36.0841954,17.7608692%2033.3379839,20.5652169%2026.9217384,20.5652169'%20id='路径-8备份'%20transform='translate(31.128260,%2016.358695)%20scale(-1,%201)%20translate(-31.128260,%20-16.358695)%20'%3e%3c/path%3e%3cline%20x1='17.9014823'%20y1='11.588091'%20x2='17.9014823'%20y2='19.9970733'%20id='路径-2'%20stroke-linecap='round'%3e%3c/line%3e%3cline%20x1='2.3484169'%20y1='11.588091'%20x2='34.3104284'%20y2='11.588091'%20id='路径-7'%3e%3c/line%3e%3cline%20x1='33.8721372'%20y1='9.34782609'%20x2='39.4402724'%20y2='9.34782609'%20id='路径-7备份'%3e%3c/line%3e%3cpath%20d='M37.5114243,38.2801333%20L42.0652174,38.2801333%20C42.8222165,31.1294628%2042.0652174,19.9970733%2039.7482269,10.8705978%20L38.8648884,0.904789217%20C38.8243442,0.420447683%2038.4193994,0.0479844782%2037.9333638,0.0479844782%20L9.67260658,0.0479844782%20C9.1563404,0.0479844782%208.73782397,0.466500908%208.73782397,0.982767087%20L8.73782397,3.73913043'%20id='路径-10'%3e%3c/path%3e%3c/g%3e%3c/g%3e%3c/svg%3e)



Custom shirts with embroidery work when the artwork, fabric, placement, and product role are developed as one specification. A small logo that sews cleanly on a stable heavyweight chest area may distort on a light knit, while an oversized design can become stiff, expensive, and uncomfortable even when the digital mockup looks balanced.
For a brand preparing a retail product, embroidery is therefore not a finishing choice made after the garment has been selected. It affects blank selection, artwork simplification, backing, thread coverage, sampling, and the information required for an accurate quote. The useful question is not whether embroidery appears more premium than print. It is whether the exact stitched result supports the intended price, wear experience, and reorder standard without damaging the garment.
That distinction also protects the buying process. A quotation based only on a logo image and garment count cannot resolve design size, stitch construction, backing, color changes, difficult placements, or sample revisions. Teams should lock these variables in stages: first the product direction, then the digitized interpretation, then the decorated sample, and finally the repeat-production record. Each approval removes a different uncertainty instead of treating one attractive mockup as proof of the finished order.
What Makes a Shirt Suitable for Embroidery?
A suitable shirt keeps the embroidered area stable during sewing and normal wear while preserving the intended fit. Fabric weight helps, but knit structure, stretch, finishing, seam location, garment construction, and the size of the design can matter just as much; no single GSM or fiber label proves that a blank is embroidery-ready.
Evaluate the garment where the needle will work
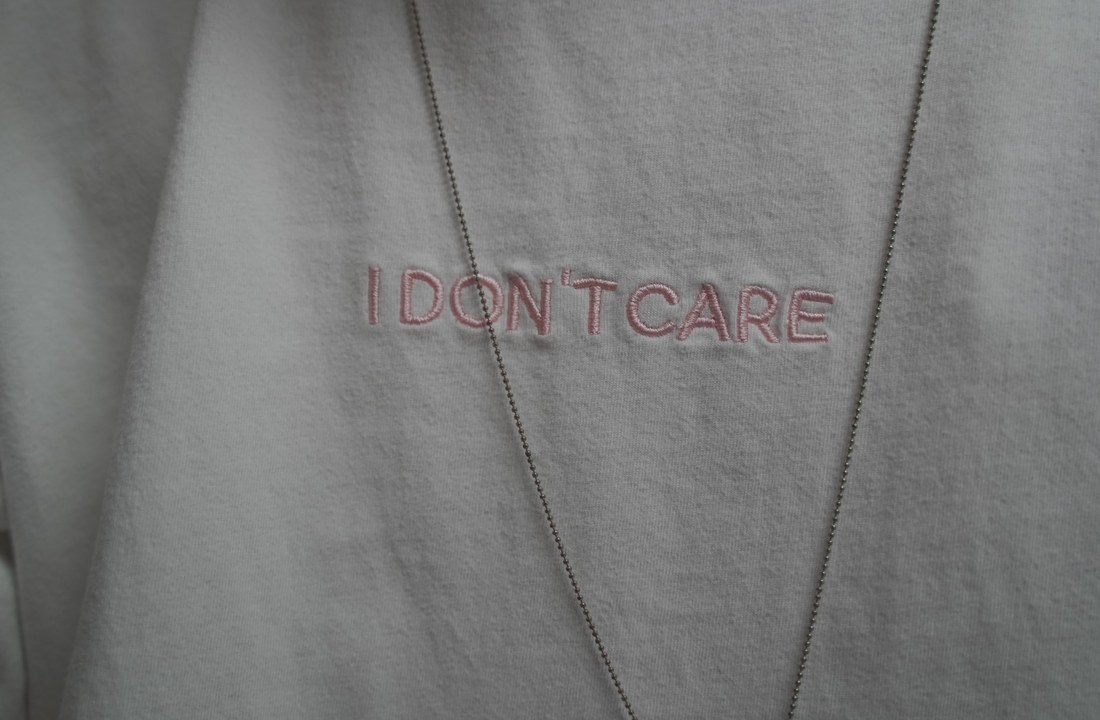
Inspect the specific placement rather than judging the shirt as a whole. A left-chest logo sits on a broad panel with relatively predictable movement. A sleeve mark may cross a narrow, curved area, and a design near a pocket, placket, side seam, zipper, or rib edge can be harder to hoop and stabilize. If the placement cannot be held flat and consistently positioned, production variation is more likely even when the fabric itself feels substantial.
Knit fabric can stretch or be pushed by repeated needle penetrations. Dense stitching concentrates that stress, while a large filled area can change how the garment drapes. The CottonWorks garment construction guidance describes how components, seams, and assembly shape the completed garment. Buyers can use that construction view to identify where embroidery may interfere with seams, pockets, lining, or mobility before requesting a sample.
Surface finishing also changes the decision. A washed hoodie, brushed interior, soft lightweight jersey, or heavily textured knit may require a different backing and design treatment from a firm, smooth tee. Do not approve embroidery from an isolated fabric swatch if the final garment includes a wash, lining, pocket, or shaped panel that changes access and stability.
Match the blank to the product position
A structured T-shirt can support a restrained chest mark or compact typography when the brand wants the garment silhouette to remain prominent. The 305GSM earth-tone drop-shoulder T-shirt is a relevant heavy T-shirt direction for testing this relationship. Its color, shoulder line, and front proportions still need to be considered with the thread color and artwork scale.
A hoodie offers a different canvas. The 400GSM washed heavyweight boxy-fit hoodie can be considered when a dense, washed streetwear product is the intended base. The buyer must check whether embroidery near the front pocket, hood, zipper area, or seam remains practical and whether the washed surface makes small thread details less legible.
Neither product should be selected merely because it is heavy. Try the intended artwork at the intended placement, wear the sample, inspect the reverse, and compare the decorated garment with the undecorated fit. If the embroidery makes the chest pull, the sleeve twist, or the body hang differently, the design, backing, placement, or blank needs revision.
How Should Artwork Be Digitized for Embroidery?
Artwork must be rebuilt as stitch instructions, not simply converted from a logo image into another file format. A digitized file defines stitch types, direction, sequence, underlay, density, trims, and color changes, so the quality of that production logic determines whether the sewn result preserves the design.
Simplify according to thread and fabric behavior
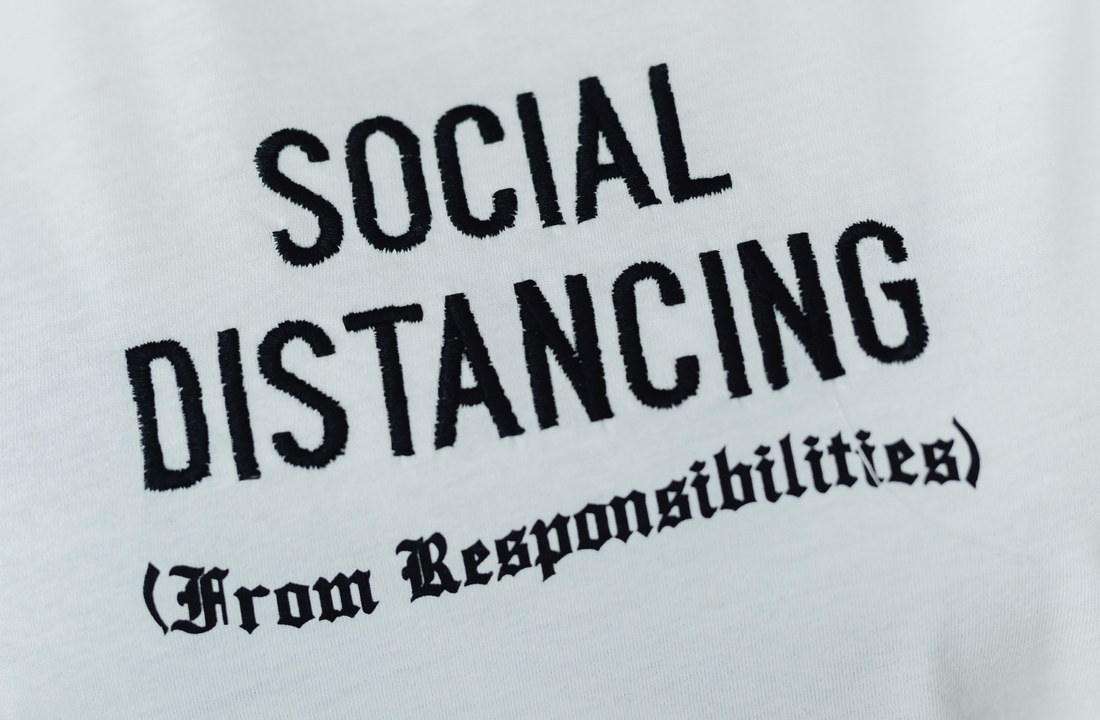
Start from a clean vector file when available, but treat it as a design reference rather than a finished embroidery program. Thin outlines, tiny counters inside letters, close parallel lines, soft gradients, and photographic shading may not translate at the intended size. Enlarging every detail is not always the answer because the finished mark can then overpower the garment or require much more coverage.
The useful brief identifies which elements are essential. A wordmark may need recognizable letter spacing more than an exact reproduction of a hairline border. A mascot may keep its silhouette and defining facial features while losing minor texture. If a detail disappears in a test sew-out, decide whether to enlarge it, simplify it, use another stitch treatment, or remove it. Do not compensate blindly by adding density; more thread can increase stiffness, puckering, needle stress, and production time.
Wilcom embroidery digitizing documentation shows that embroidery objects carry properties such as stitch type and effects. This supports an important purchasing boundary: the visual source file and the machine-ready file are different deliverables. Buyers should retain both the approved artwork and the final digitized revision used for the sample.
Approve a sew-out rather than a screen preview
A digital preview can reveal placement and broad color relationships, but it cannot prove fabric distortion, thread coverage, registration, edge definition, or reverse-side comfort. Request a sew-out on the target garment or, for an early diagnostic, on material that genuinely represents the same construction and finish. A test on rigid woven fabric does not approve the same design on stretchy jersey.
Check the sample at normal viewing distance and under close inspection. Confirm the logo silhouette, readable text, clean boundaries, intended texture, thread color, start and stop points, and whether the garment lies naturally after the hoop is removed. Mark the approved file revision and dimensions. If the design size changes later, it may need redigitizing; scaling a stitch file can change spacing and coverage in ways that a simple image resize does not show.
Where Should Embroidery Be Placed?
Placement should be chosen by wear visibility, garment construction, hoop access, and the physical weight of the stitched area. A familiar left-chest position is often easier to control than a seam-heavy sleeve or hood, but the correct choice still depends on the logo dimensions, size range, and how the garment sits on the body.
Use garment landmarks and a size rule
Define placement from repeatable construction landmarks rather than saying “roughly on the chest.” The specification might reference the center front, shoulder seam, collar seam, pocket edge, sleeve fold, or another stable point. The exact measurement should come from the approved sample and pattern, not from an unsupported universal template.
Review the mark across the offered size range. A fixed-distance placement may look high, low, or too close to a seam as garment dimensions change. Conversely, proportional scaling can make a logo inconsistent across customer photos and team use. Decide whether artwork dimensions remain fixed, whether position shifts by size group, and which representative sizes must be sampled. Record this logic in the order specification.
For hoodies, consider the pocket and hood in both flat and worn positions. A center-chest mark that looks clear on a table can be crowded by drawcords or sit too close to a kangaroo pocket. Sleeve embroidery must account for arm rotation and the seam. The custom hoodie selection guide helps buyers separate blank, fit, fabric, and product-role questions before finalizing decoration.
Check backing, comfort, and interior appearance
Backing supports the fabric while the design is stitched and remains an important part of the finished result. The Madeira cut-away stabilizer guide explains that cut-away products are intended to remain with the embroidery and support designs on unstable materials. That guidance is a general technical reference, not a fixed prescription for every shirt.
Ask what backing is proposed, why it suits the fabric, how much remains after trimming, and whether the reverse can contact skin. A technically stable logo can still be a poor T-shirt product if the interior feels abrasive or the remaining backing shows through a light color. For a hoodie, the thicker garment may conceal the reverse more effectively, but pocket access, lining, and bulk can create other production constraints.
Wear-test the garment rather than assessing the reverse only by hand. Movement, sweat, laundering, and contact pressure may expose discomfort that is not obvious on a flat sample. If comfort is unacceptable, options include reducing design coverage, changing stitch construction, modifying backing, moving the mark, adding an appropriate interior solution, or choosing print instead.
When Is Print Better Than Embroidery?
Print is often better when the artwork depends on gradients, photographic detail, very fine distressing, or broad coverage that would become heavy in thread. Embroidery is often stronger for compact marks, tactile identity, and designs that can be simplified into stable stitched shapes, but neither method should be selected by prestige alone.
Compare the completed product rather than method labels
The same logo can play different roles. A small embroidered chest mark may function as restrained brand identification, while a large DTG or DTF back graphic can carry the collection narrative. Combining methods can be appropriate when each placement has a clear purpose, although it increases sampling, setup, cost comparison, and quality-control requirements.
The related embroidery hoodies versus print guide provides a focused comparison for hoodie projects. For the current purchase, test the exact artwork and garment rather than extending a conclusion from a different fabric or design size.
The following table turns method selection into an order decision.
| Decision factor | Embroidery direction | DTG or DTF direction | Approval evidence |
|---|---|---|---|
| Artwork structure | Compact shapes, controlled text, separable color areas | Gradients, photographic detail, complex distressing | Sew-out or printed sample from final file |
| Coverage | Small to moderate area where thread weight remains acceptable | Broad graphic area where flexibility and hand are tested | Worn-garment drape and comfort check |
| Surface and stretch | Fabric and backing can hold registration without distortion | Surface and process produce required opacity and detail | Target blank in launch color |
| Product role | Tactile brand mark or restrained identity | Illustration-led or statement graphic | Merchandising mockup plus physical sample |
| Reorder control | Approved digitized file, threads, size, placement, backing | Approved artwork, process, color setup, size, placement | Retained specification and reference sample |
A method should be rejected when its physical result conflicts with the product promise. Embroidery is a weak choice for a large, dense rectangle on a soft tee if stiffness and distortion remain after revision. Print is a weak substitute when the product depends on a raised, thread-based mark and the sampled print cannot deliver that identity. The decision must survive wear and repeat production, not just look convincing in a mockup.
What Must Be Approved Before Bulk Production?
Approve the final garment, digitized file, thread colors, design dimensions, placement, backing, interior finish, and a representative sewn sample before a larger order. The approval record should also state size logic, permitted tolerances, packaging, care information, and which changes require a new sample.
Inspect the sample as a complete retail garment
Begin with artwork identity: confirm spelling, proportions, readable counters, borders, and intended color. Then inspect production behavior: puckering, gaps, thread buildup, fabric show-through, registration, loose threads, trimming, backing, needle marks, and distortion around the design. Turn the garment inside out and wear it. A clean front does not excuse an uncomfortable or poorly finished reverse.
Review garment construction and measurements after decoration. The CottonWorks garment quality control guidance distinguishes materials, construction, measurements, appearance, and performance within garment evaluation. That is useful because embroidery approval should not hide a collar, seam, sizing, or finish problem elsewhere on the product.
Plan a care test under the intended instructions. The AATCC standard test method directory lists separate procedures covering appearance, dimensional change, colorfastness, and other textile properties. Buyers should agree on the relevant test and conditions rather than claiming an unspecified standard. After laundering, compare garment dimensions, shape, thread appearance, puckering, color, and backing behavior with the pre-wash record.
Send a quotation brief that can be reproduced
A production-ready inquiry includes garment link or specification, colors, size breakdown, quantities, final vector artwork, desired design dimensions, placement, thread color references, labels, packaging, destination, and target delivery date. Ask whether digitizing, a sew-out, a decorated garment sample, and revisions are separate line items. If a quote is based on incomplete artwork or an approximate size, treat it as provisional.
Cloprod’s custom apparel embroidery options identify embroidery among its available customization methods. A project-specific review is still required to confirm the garment, artwork, placement, and order conditions. Send the same brief to every candidate so price comparisons describe the same product.
Retain the approved source art, digitized file version, machine-ready dimensions, thread references, backing decision, placement measurements, garment identifier, sample images, care-test notes, and packing specification. If the blank, fabric, wash, size rule, artwork, or placement changes, identify whether resampling is necessary. Reorder control depends on that record; a product name and logo image alone do not reproduce an embroidered garment.
Before signing off, assign responsibility for each record. Design should confirm visual identity, product development should confirm garment and placement, and purchasing should confirm quantity, price scope, delivery assumptions, and approved revision. If one team changes a file or garment after approval, the change must return to the affected checks. This prevents an outdated mockup, sample, or digitized file from becoming the production reference by accident.
Conclusion
Custom shirts with embroidery should be bought as engineered garments, not as blank shirts with a logo added at the end. Start by checking the exact placement for construction, stretch, access, and comfort. Then simplify the artwork around the intended size, approve a purpose-built digitized file, and test the result on the target T-shirt or hoodie.
Choose embroidery when compact stitched texture supports the product role. Choose DTG or DTF when detail, gradients, or broad coverage make print the better physical result. Before ordering, approve the sewn sample, backing, reverse finish, placement by size, care result, labels, packaging, and reorder record. To obtain a comparable project quotation, send Cloprod the garment choice, final artwork, desired dimensions, colorways, size quantities, target delivery date, and branding requirements through its custom apparel embroidery options. These inputs allow the production decision to be based on the actual product rather than a generic stitch rule.
FAQ
Can any logo be digitized for embroidery?
Most logos can be interpreted, but not every detail should be copied at every size. Fine lines, tiny text, gradients, and close negative spaces may need simplification. Approve the digitized file through a sew-out on representative material before production.
Does a heavier shirt always prevent embroidery puckering?
No. Weight can improve stability, but knit structure, stretch, stitch direction, density, underlay, tension, backing, hooping, and design size also affect distortion. Evaluate the decorated target garment and correct the actual variable rather than selecting by GSM alone.
Should the same logo file be used on T-shirts and hoodies?
The source artwork can remain consistent, but the machine-ready treatment may need to change. Different fabrics, finishes, backing choices, and placements can require another digitized revision and sample. Preserve separate approved files when the specifications differ.
What should a buyer send for an embroidery quote?
Send the garment, color and size quantities, vector artwork, intended design size and placement, thread color direction, labels, packaging, destination, and delivery target. Ask whether digitizing and samples are included. Final pricing should follow review of the exact design rather than an assumed stitch count.
When should a brand resample an embroidery reorder?
Resample when the blank, fabric, finish, design size, digitized file, placement, backing, or other approved condition changes materially. If nothing changed, compare production with the retained sample and specification. A previous approval does not automatically cover a revised garment.