%20-%20https://sketch.com%20--%3e%3ctitle%3eT-shirts备份%202%3c/title%3e%3cdesc%3eCreated%20with%20Sketch.%3c/desc%3e%3cg%20id='T-shirts备份-2'%20stroke='none'%20stroke-width='1'%20fill='none'%20fill-rule='evenodd'%20transform='translate(0.000000,%201.000000)'%3e%3cg%20id='编组'%20transform='translate(1.000000,%2010.607599)'%20stroke='%23333333'%20stroke-width='2'%3e%3cpath%20d='M24.7506037,2.40561696%20L24.4109858,2.94791681%20C23.1539677,5.92351386%2021.831857,6.92184787%2018.472318,6.92184787%20C15.0918065,6.92184787%2013.7880665,5.90817694%2012.5599904,2.88704991%20C12.3847844,2.4561805%2012.0176189,2.13892356%2011.5768399,2.03613378%20C11.1481647,1.93340907%2010.6944147,2.05271913%2010.3590373,2.35903823%20L2.14473535,9.86550133%20C0.720776712,11.1696549%200.606481197,13.4202167%201.87710556,14.8789444%20L2.07276829,15.0840278%20C2.25830914,15.270309%202.47988147,15.4396542%202.72897579,15.5864188%20L7.32818819,18.2773511%20L7.28090871,18.9005194%20L6.25354816,32.4414343%20C6.21073375,32.9642561%206.44784527,33.473791%206.86639235,33.7641227%20C10.1405412,36.0536646%2013.3721888,37%2018.5296327,37%20C23.6951097,37%2026.9045107,36.0489513%2030.1280064,33.7695522%20L30.283246,33.6433265%20C30.6132328,33.3345129%2030.7846536,32.871259%2030.7355391,32.4039313%20L29.3432358,18.2472635%20L29.9205868,17.9293432%20L34.180155,15.5837978%20C35.172928,15.0358955%2035.8462157,14.0242248%2035.9766588,12.8762784%20C36.1078384,11.7218503%2035.6805042,10.5744842%2034.8363688,9.80961913%20L26.6326031,2.35780292%20C26.2994807,2.05668927%2025.8445706,1.93608725%2025.4144091,2.03482553%20C25.1685409,2.08962871%2024.9357839,2.22011465%2024.7506037,2.40561696%20Z'%20id='路径'%20fill-rule='nonzero'%3e%3c/path%3e%3cpath%20d='M32.0227213,7.12706337%20C34.1435585,6.79908718%2035.5589604,6.0103637%2036.2689268,4.76089296%20C36.7450972,3.92288014%2037.1241904,3.15623869%2037.4062064,2.46096862%20C37.6137918,1.94917626%2038.1969662,1.70257588%2038.7087556,1.91016839%20C38.8174691,1.95426485%2038.9175753,2.01714687%2039.0044951,2.09593814%20L47.0583283,9.39659336%20L47.7193116,10.1076368%20C49.0578159,11.5475138%2048.9756371,13.7998368%2047.5357601,15.1383411%20C47.3875203,15.2761442%2047.2277976,15.4010531%2047.0583283,15.5117097%20L41.9602936,18.3560999%20L43.2627471,32.7848946%20C43.2911962,33.0999871%2043.168856,33.4099546%2042.932878,33.6206843%20C42.6875325,33.8397791%2042.4886172,34.0097554%2042.3361319,34.1306133%20C39.7263264,36.1991123%2036.3979867,37.2333618%2032.3511128,37.2333618%20C28.7945467,37.2333618%2026.1316404,36.9623653%2024.3623939,36.4203724'%20id='路径-2'%20stroke-linecap='round'%3e%3c/path%3e%3c/g%3e%3cpath%20d='M33.4666494,4%20C32.7228105,4%2032.5,6.59294054%2031.8988718,7.11217576%20C31.2977436,7.63141098%2029.4332988,7.40648891%2029.4332988,8.12452017%20C29.4332988,8.84255143%2031.2477079,9.14206726%2031.8988718,9.8748333%20C32.5500357,10.6075994%2032.7509178,13.450957%2033.4666494,13.450957%20C34.182381,13.450957%2034.3969063,10.4640601%2034.8062404,9.8748333%20C35.2155745,9.28560653%2037.2689268,8.78824215%2037.2689268,8.12452017%20C37.2689268,7.46079818%2035.2474011,7.64545819%2034.8062404,7.11217576%20C34.3650797,6.57889333%2034.2104883,4%2033.4666494,4%20Z'%20id='路径-14'%20fill='%23333333'%3e%3c/path%3e%3c/g%3e%3c/svg%3e)
'%20stroke-linejoin='round'%3e%3cg%20id='编组'%20transform='translate(9.000000,%207.000000)'%20fill-rule='nonzero'%20stroke='%23333333'%20stroke-width='2'%3e%3cpath%20d='M31.6580999,-0.102439008%20C30.5100269,2.18823585%2030.0542426,5.67474993%2030.3587763,9.42418424%20C30.6822663,13.3951973%2031.8077846,17.2494259%2033.4717621,19.9872374%20L33.4717621,19.9872374%20L33.4717621,40.5126294%20L-1,40.5126294%20L-1,19.9934791%20C0.658093371,17.2553578%201.78946921,13.4009517%202.11296635,9.42985083%20C2.41752353,5.68012736%201.96173463,2.19367658%200.813663539,-0.0970116329%20L0.813663539,-0.0970116329%20L8.12511393,-0.0970116329%20C7.93029031,2.82458939%208.80601437,5.51057742%2010.5050219,7.35259165%20C11.911224,8.87715484%2013.8817335,9.80794816%2016.2358811,9.80794816%20C18.5896257,9.80794816%2020.5597831,8.8761884%2021.9658812,7.35090274%20C23.6654197,5.50730309%2024.5415191,2.81937778%2024.3466448,-0.102439008%20L24.3466448,-0.102439008%20Z'%20id='路径'%3e%3c/path%3e%3cline%20x1='0'%20y1='35.5434153'%20x2='33.3493773'%20y2='35.5434153'%20id='路径-5'%3e%3c/line%3e%3cpath%20d='M7.02092154,-7.10542736e-15%20C10.1319066,2.93766424%2013.2035597,4.40649636%2016.2358811,4.40649636%20C19.2682024,4.40649636%2022.2974375,2.93766424%2025.3235864,-7.10542736e-15'%20id='路径-7'%20stroke-linecap='round'%3e%3c/path%3e%3cpath%20d='M31.4953977,2.63284558%20L36.4771799,2.61608223%20C35.6927912,8.39179041%2036.7632888,14.5260803%2039.6886728,21.018952%20L39.6886728,39.4218217%20L34.3249871,39.4218217'%20id='路径-9'%20stroke-linecap='round'%3e%3c/path%3e%3c/g%3e%3c/g%3e%3c/svg%3e)
'%3e%3cpath%20d='M19.7354789,3.20880828%20C19.7605297,5.17861174%2020.6448662,6.94071017%2022.0295594,8.13965347%20C23.1932709,9.14725872%2024.711067,9.75671011%2026.3711606,9.75671011%20C28.0312542,9.75671011%2029.5490503,9.14725872%2030.7127618,8.13965347%20C31.8921595,7.11846622%2032.7085685,5.68873246%2032.9402054,4.07008582%20C32.9791132,3.79820377%2033.0006898,3.52681041%2033.0059749,3.25726284%20C33.3088406,3.22718757%2033.6170537,3.21177646%2033.9300294,3.21174794%20C36.1624168,3.21154457%2038.1526409,3.99399935%2039.6884369,5.29843532%20C41.2675336,6.63964892%2042.3676941,8.53665197%2042.7454691,10.7166588%20L42.7454691,10.7166588%20L46.1709196,41.7693318%20C46.247944,42.3321697%2046.0859691,42.8829051%2045.7084154,43.3183964%20C45.3612167,43.722187%2044.8663578,43.9753491%2044.3260734,44.0229386%20L44.3260734,44.0229386%20L39.8040277,44.0310553%20C39.3781173,44.0310553%2038.9829429,43.8965525%2038.6635982,43.6700095%20C38.3024986,43.4138456%2038.038002,43.0403296%2037.9249985,42.6039024%20L37.9249985,42.6039024%20L37.6832738,41.0277321%20C37.0157385,42.0213966%2035.9570908,42.6391292%2034.7706802,42.7062063%20L34.7706802,42.7062063%20L16.8781526,42.7122292%20C15.6665116,42.7122292%2014.5474319,42.1274244%2013.8744406,41.1564779%20L13.8744406,41.1564779%20L13.5787457,42.5263987%20C13.4931715,42.9254624%2013.2806044,43.2768413%2012.9822705,43.540301%20C12.6774394,43.8094984%2012.2828471,43.9856112%2011.8527165,44.0228058%20L11.8527165,44.0228058%20L7.2966742,44.0301767%20C6.68507413,44.0301767%206.11615304,43.7675926%205.72859965,43.3188465%20C5.38697876,42.9229494%205.22291954,42.434758%205.24956026,41.9304278%20L5.24956026,41.9304278%20L9.114459,10.9787644%20C9.43354023,8.78714507%2010.4574643,6.866184%2011.9617204,5.48365114%20C13.439357,4.12558378%2015.381771,3.28220853%2017.5931807,3.21561749%20L17.5931807,3.21561749%20Z'%20id='形状结合'%20stroke='%23333333'%20stroke-width='2'%20stroke-linejoin='round'%20fill-rule='nonzero'%3e%3c/path%3e%3cline%20x1='14.9471931'%20y1='16.0295055'%20x2='13.8670819'%20y2='43.1333598'%20id='路径-2'%20stroke='%23333333'%20stroke-width='2'%20stroke-linejoin='round'%20fill-rule='nonzero'%3e%3c/line%3e%3cline%20x1='37.6587671'%20y1='16.0295055'%20x2='36.567858'%20y2='43.1333598'%20id='路径-2备份'%20stroke='%23333333'%20stroke-width='2'%20stroke-linejoin='round'%20fill-rule='nonzero'%20transform='translate(37.113313,%2029.581433)%20scale(-1,%201)%20translate(-37.113313,%20-29.581433)%20'%3e%3c/line%3e%3cpath%20d='M4.14236007,0%20C3.37841745,0%203.14958501,2.66302001%202.53221008,3.19628862%20C1.91483515,3.72955722%200,3.49855617%200,4.23599369%20C0,4.9734312%201.86344714,5.28104205%202.53221008,6.03361258%20C3.20097302,6.78618312%203.4072844,9.70638822%204.14236007,9.70638822%20C4.87743575,9.70638822%205.09775907,6.6387644%205.51815625,6.03361258%20C5.93855342,5.42846076%208.04740171,4.9176541%208.04740171,4.23599369%20C8.04740171,3.55433327%205.97124022,3.74398409%205.51815625,3.19628862%20C5.06507227,2.64859315%204.9063027,0%204.14236007,0%20Z'%20id='路径-14'%20fill='%23333333'%3e%3c/path%3e%3cline%20x1='6.44444444'%20y1='38.3089431'%20x2='13.2552553'%20y2='38.3089431'%20id='路径-3'%20stroke='%23333333'%20stroke-width='2'%20stroke-linejoin='round'%20fill-rule='nonzero'%3e%3c/line%3e%3cline%20x1='38'%20y1='38.3089431'%20x2='45.8108108'%20y2='38.3089431'%20id='路径-3备份'%20stroke='%23333333'%20stroke-width='2'%20stroke-linejoin='round'%20fill-rule='nonzero'%3e%3c/line%3e%3c/g%3e%3c/g%3e%3c/svg%3e)
'%3e%3cpath%20d='M34.9261439,0%20C34.1622012,0%2033.9333688,2.66302001%2033.3159939,3.19628862%20C32.6986189,3.72955722%2030.7837838,3.49855617%2030.7837838,4.23599369%20C30.7837838,4.9734312%2032.6472309,5.28104205%2033.3159939,6.03361258%20C33.9847568,6.78618312%2034.1910682,9.70638822%2034.9261439,9.70638822%20C35.6612195,9.70638822%2035.8815429,6.6387644%2036.30194,6.03361258%20C36.7223372,5.42846076%2038.8311855,4.9176541%2038.8311855,4.23599369%20C38.8311855,3.55433327%2036.755024,3.74398409%2036.30194,3.19628862%20C35.8488561,2.64859315%2035.6900865,0%2034.9261439,0%20Z'%20id='路径-14'%20fill='%23333333'%3e%3c/path%3e%3cpath%20d='M18.4864865,7.18963854%20C15.4758095,7.17353458%2011.6765338,8.43151301%209.29444611,11.1321905%20C6.91235846,13.832868%201.25126095,20.2672047%200.387510052,31.5103084%20C-0.188323879,39.0057108%20-0.122397588,42.4815693%200.585288924,41.9378837%20L5.35517862,43.1351351%20C6.49874742,42.6940382%207.11008428,41.3246688%207.18918919,39.027027%20C10.964873,40.352122%2014.7306388,40.9373335%2018.4864865,40.7826614%20C22.2423342,40.6279893%2026.0080999,40.0943847%2029.7837838,39.1818475%20C30.1353835,41.4550539%2030.9437088,42.7728164%2032.2087597,43.1351351%20L35.97522,42.1868999%20C37.082045,41.6368999%2037.2680046,38.0780361%2036.5330988,31.5103084%20C35.4307401,21.6587169%2030.3374081,13.8085547%2027.6629466,11.1321905%20C24.9884851,8.45582629%2021.4971635,7.2057425%2018.4864865,7.18963854%20Z'%20id='路径-2'%20stroke='%23333333'%20stroke-width='2'%20stroke-linejoin='round'%20fill-rule='nonzero'%3e%3c/path%3e%3cpath%20d='M30.4824021,39.027027%20C29.7361521,36.2882883%2029.7873366,33.5495495%2030.6359556,30.8108108'%20id='路径-4'%20stroke='%23333333'%20stroke-width='2'%20stroke-linecap='round'%20stroke-linejoin='round'%20fill-rule='nonzero'%20transform='translate(30.297297,%2034.918919)%20scale(-1,%201)%20translate(-30.297297,%20-34.918919)%20'%3e%3c/path%3e%3cpath%20d='M18.5081607,1.02702703%20C23.5904804,1.02702703%2028.8837764,7.80750772%2027.5089127,10.5572351%20C26.1340491,13.3069625%2011.044553,13.6315238%209.50740862,10.5572351%20C7.97026429,7.48294643%2013.4258409,1.02702703%2018.5081607,1.02702703%20Z'%20id='矩形'%20stroke='%23333333'%20stroke-width='2'%20stroke-linejoin='round'%20fill-rule='nonzero'%3e%3c/path%3e%3cpath%20d='M14.2487482,28.9937363%20C14.9334329,27.7204903%2015.1527269,26.6144701%2014.9066303,25.6756757%20L22.1744145,25.6756757%20C22.1611041,26.952086%2022.3983129,28.0581062%2022.8860409,28.9937363%20C23.3737689,29.9293664%2024.1722123,30.8774003%2025.2813711,31.8378378%20L24.6486486,35.9459459%20C22.5945946,36.4426461%2020.5405405,36.6909962%2018.4864865,36.6909962%20C16.4324324,36.6909962%2014.3783784,36.4426461%2012.3243243,35.9459459%20L11.6895463,31.8378378%20C12.7109962,31.2150162%2013.5640635,30.2669823%2014.2487482,28.9937363%20Z'%20id='矩形'%20stroke='%23333333'%20stroke-width='2'%20stroke-linecap='round'%20stroke-linejoin='round'%20fill-rule='nonzero'%3e%3c/path%3e%3cpath%20d='M6.8607805,39.027027%20C6.11453049,36.2882883%206.16571499,33.5495495%207.014334,30.8108108'%20id='路径-4'%20stroke='%23333333'%20stroke-width='2'%20stroke-linecap='round'%20stroke-linejoin='round'%20fill-rule='nonzero'%3e%3c/path%3e%3c/g%3e%3c/g%3e%3c/svg%3e)
'%20fill-rule='nonzero'%20stroke='%23333333'%20stroke-width='2'%3e%3cpath%20d='M30.2050905,-0.0716765239%20C30.6708724,-0.020568619%2031.0989537,0.0686601335%2031.483746,0.196177499%20C33.6750695,0.92236607%2036.250887,3.48295379%2038.4018553,7.23671243%20C40.2937276,10.5383101%2041.8772238,14.7414509%2042.6174967,19.2400665%20C43.3015193,23.3968505%2043.7565804,28.9686602%2043.9784178,35.9547829%20C44.0400516,36.4969187%2043.8781366,37.0250522%2043.5140054,37.4450611%20C43.2062203,37.8030139%2042.7813981,38.041594%2042.3119771,38.1218049%20L42.3119771,38.1218049%20L37.9607078,39.444336%20C37.4726975,39.4862166%2037.0161903,39.348771%2036.6566164,39.0936894%20C36.3026307,38.8425722%2036.0422434,38.4777692%2035.9279386,38.0514231%20L35.9279386,38.0514231%20L35.6512065,36.5336709%20C35.0300844,37.3677575%2030.555744,39.4518537%2024.4058776,39.4509091%20C18.2992611,39.4499711%2014.4288377,37.4473381%2013.778979,36.6481801%20L13.778979,36.6481801%20L13.4946346,37.9590944%20C13.409733,38.3550217%2013.1988587,38.7036554%2012.9028653,38.9650483%20C12.5531444,39.2738881%2012.0843057,39.4592101%2011.5795724,39.4506141%20L11.5795724,39.4506141%20L6.83733744,37.7838851%20C6.30688108,37.734067%205.8219314,37.4841832%205.47966262,37.0878719%20C5.10475105,36.6533949%204.94361938,36.1075601%205.01987087,35.5487108%20C5.87952927,27.1575901%206.62275357,21.5194236%207.24381867,18.6331488%20C8.15689051,14.3898316%2010.0567274,9.62710944%2012.2478489,6.01913378%20C14.4198269,2.44268049%2016.9155321,0.126020223%2019.0038476,-0.0341941814%20C19.3349904,-0.059599273%2019.684528,-0.0329792934%2020.048933,0.0426727475%20C20.0485026,0.322038007%2020.0587709,0.606972386%2020.0781127,0.89613626%20C20.1906468,2.57854425%2020.5885245,4.07814763%2021.5538567,5.09082243%20C22.3562527,5.93257014%2023.5496125,6.39100896%2025.2079599,6.39100896%20C26.8232274,6.39100896%2027.9750703,5.95750793%2028.7455387,5.15028431%20C29.680592,4.17062417%2030.0530617,2.7130328%2030.1717874,1.07319992%20C30.200092,0.68225832%2030.2126331,0.299489175%2030.2050905,-0.0716765239%20Z'%20id='形状结合'%3e%3c/path%3e%3cpath%20d='M19.5133106,0%20C21.3811567,1.7116825%2022.6015035,2.13363743%2025.1288966,2.13363743%20C27.6562896,2.13363743%2028.7112206,1.7116825%2031.0265736,0'%20id='路径-7'%20stroke-linecap='round'%3e%3c/path%3e%3cpath%20d='M14.2776845,37.1340996%20C13.4265244,34.2247524%2013.6221502,31.1532826%2014.63166,28.1550842'%20id='路径-4'%20stroke-linecap='round'%3e%3c/path%3e%3cpath%20d='M35.6114473,37.1340996%20C34.7602872,34.2247524%2034.955913,31.1532826%2035.9654228,28.1550842'%20id='路径-4备份'%20stroke-linecap='round'%20transform='translate(35.520490,%2032.644592)%20scale(-1,%201)%20translate(-35.520490,%20-32.644592)%20'%3e%3c/path%3e%3cpath%20d='M15.6089327,1.73235424%20C14.8279907,1.73235424%2013.5856023,1.15490283%2011.8817673,-5.68434189e-14%20C5.88636871,6.20145775%202.28312945,13.1925875%201.07204948,20.9733893%20C-0.139030491,28.754191%20-0.190632326,32.961664%200.917243972,33.5958082%20L4.99556447,35.210175'%20id='路径-2'%20stroke-linecap='round'%3e%3c/path%3e%3c/g%3e%3cpath%20d='M25.5592019,34.3180607%20C26.2438866,33.0448147%2026.4631806,31.9387944%2026.217084,31%20L33.4848682,31%20C33.4715578,32.2764103%2033.7087666,33.3824305%2034.1964946,34.3180607%20C34.6842225,35.2536908%2035.4826659,36.2017246%2036.5918248,37.1621622%20L35.9591023,41.2702703%20C33.9050483,41.7669705%2031.8509942,42.0153206%2029.7969402,42.0153206%20C27.7428861,42.0153206%2025.6888321,41.7669705%2023.634778,41.2702703%20L23,37.1621622%20C24.0214499,36.5393405%2024.8745172,35.5913066%2025.5592019,34.3180607%20Z'%20id='矩形'%20stroke='%23333333'%20stroke-width='2'%20stroke-linecap='round'%20fill-rule='nonzero'%3e%3c/path%3e%3c/g%3e%3c/svg%3e)
'%20fill-rule='nonzero'%20stroke='%23333333'%20stroke-linejoin='round'%20stroke-width='2'%3e%3cpath%20d='M23.9621848,47.8189278%20C23.5302392,47.8189278%2023.1846827,47.5165659%2023.0982935,47.0846203%20L19.2107828,24.2778909%20L15.3232721,47.0846203%20C15.236883,47.5165659%2014.8913265,47.8189278%2014.4593809,47.8189278%20L1.26379866,47.8189278%20C1.00463128,47.8189278%200.788658489,47.7325387%200.615880175,47.5165659%20C0.44310192,47.3437877%200.356712793,47.0846203%200.399907386,46.8254529%20C1.6957443,32.7872199%204.15783439,5.79061781%204.15783439,4.23561352%20L4.15783439,3.5445005%20L4.15783439,1.29838325%20C4.15783439,0.823243081%204.54658544,0.434491979%205.02172561,0.434491979%20L33.8629155,0.434491979%20C34.3380556,0.434491979%2034.7268067,0.823243022%2034.7268067,1.29838325%20L34.7268067,4.14922439%20C35.4611143,9.4189611%2038.35515,45.3136432%2038.4847338,46.8254529%20C38.4847338,47.0846203%2038.4415392,47.3005931%2038.2687609,47.5165659%20C38.0959826,47.6893442%2037.8800099,47.8189278%2037.6208425,47.8189278%20L23.9621848,47.8189278%20Z'%20id='路径'%3e%3c/path%3e%3cpath%20d='M12.2091913,7.64705882%20C13.2588301,14.6696078%2010.1386094,18.1808824%202.84852941,18.1808824'%20id='路径-8'%3e%3c/path%3e%3cpath%20d='M36.6606619,7.64705882%20C37.7103006,14.6696078%2034.59008,18.1808824%2027.3,18.1808824'%20id='路径-8备份'%20transform='translate(32.079412,%2012.913971)%20scale(-1,%201)%20translate(-32.079412,%20-12.913971)%20'%3e%3c/path%3e%3cline%20x1='4.36015661'%20y1='6.85020053'%20x2='35.4250589'%20y2='6.85020053'%20id='路径-7'%3e%3c/line%3e%3cline%20x1='22.9411765'%20y1='43.0147059'%20x2='38.2352941'%20y2='43.0147059'%20id='路径-3备份'%3e%3c/line%3e%3cline%20x1='0.955882353'%20y1='43.0147059'%20x2='16.25'%20y2='43.0147059'%20id='路径-3备份-2'%3e%3c/line%3e%3c/g%3e%3cpath%20d='M6.14236007,5%20C5.37841745,5%205.14958501,7.66302001%204.53221008,8.19628862%20C3.91483515,8.72955722%202,8.49855617%202,9.23599369%20C2,9.9734312%203.86344714,10.281042%204.53221008,11.0336126%20C5.20097302,11.7861831%205.4072844,14.7063882%206.14236007,14.7063882%20C6.87743575,14.7063882%207.09775907,11.6387644%207.51815625,11.0336126%20C7.93855342,10.4284608%2010.0474017,9.9176541%2010.0474017,9.23599369%20C10.0474017,8.55433327%207.97124022,8.74398409%207.51815625,8.19628862%20C7.06507227,7.64859315%206.9063027,5%206.14236007,5%20Z'%20id='路径-14'%20fill='%23333333'%3e%3c/path%3e%3c/g%3e%3c/svg%3e)
'%20fill-rule='nonzero'%20stroke='%23333333'%20stroke-width='2'%3e%3cpath%20d='M33.0403779,3.78231646%20C33.3707049,3.78231646%2033.6611649,4.12340341%2033.7295084,4.6094523%20C33.9402343,6.02496304%2034.1224837,11.3518882%2034.3104284,12.7759262%20L34.3104284,12.7759262%20L34.2695566,12.7765763%20C35.9295803,22.1661353%2036.8219297,30.5371284%2036.5177248,40.2716845%20L36.5177248,40.2716845%20L36.4949436,41.0291585%20L20.6164655,41.0291585%20L18.3311855,27.8254864%20C18.2913184,27.546417%2017.8926479,27.546417%2017.8527808,27.8254864%20L17.8527808,27.8254864%20L16.0602308,41.0291585%20L0.181752703,41.0291585%20L0.158971523,40.2716845%20C-0.146886806,30.6582401%200.297947405,22.3663342%201.86201358,13.1114332%20L1.91967082,12.7759262%20C2.10761547,11.3518882%202.28986491,6.02496304%202.50059073,4.6094523%20C2.57462954,4.12340341%202.85939423,3.78231646%203.18972123,3.78231646%20L3.18972123,3.78231646%20Z'%20id='形状结合'%3e%3c/path%3e%3cpath%20d='M9.07993884,12.1521737%20C10.0037613,17.7608692%207.25754983,20.5652169%200.841304326,20.5652169'%20id='路径-8'%3e%3c/path%3e%3cpath%20d='M35.1603729,12.1521737%20C36.0841954,17.7608692%2033.3379839,20.5652169%2026.9217384,20.5652169'%20id='路径-8备份'%20transform='translate(31.128260,%2016.358695)%20scale(-1,%201)%20translate(-31.128260,%20-16.358695)%20'%3e%3c/path%3e%3cline%20x1='17.9014823'%20y1='11.588091'%20x2='17.9014823'%20y2='19.9970733'%20id='路径-2'%20stroke-linecap='round'%3e%3c/line%3e%3cline%20x1='2.3484169'%20y1='11.588091'%20x2='34.3104284'%20y2='11.588091'%20id='路径-7'%3e%3c/line%3e%3cline%20x1='33.8721372'%20y1='9.34782609'%20x2='39.4402724'%20y2='9.34782609'%20id='路径-7备份'%3e%3c/line%3e%3cpath%20d='M37.5114243,38.2801333%20L42.0652174,38.2801333%20C42.8222165,31.1294628%2042.0652174,19.9970733%2039.7482269,10.8705978%20L38.8648884,0.904789217%20C38.8243442,0.420447683%2038.4193994,0.0479844782%2037.9333638,0.0479844782%20L9.67260658,0.0479844782%20C9.1563404,0.0479844782%208.73782397,0.466500908%208.73782397,0.982767087%20L8.73782397,3.73913043'%20id='路径-10'%3e%3c/path%3e%3c/g%3e%3c/g%3e%3c/svg%3e)


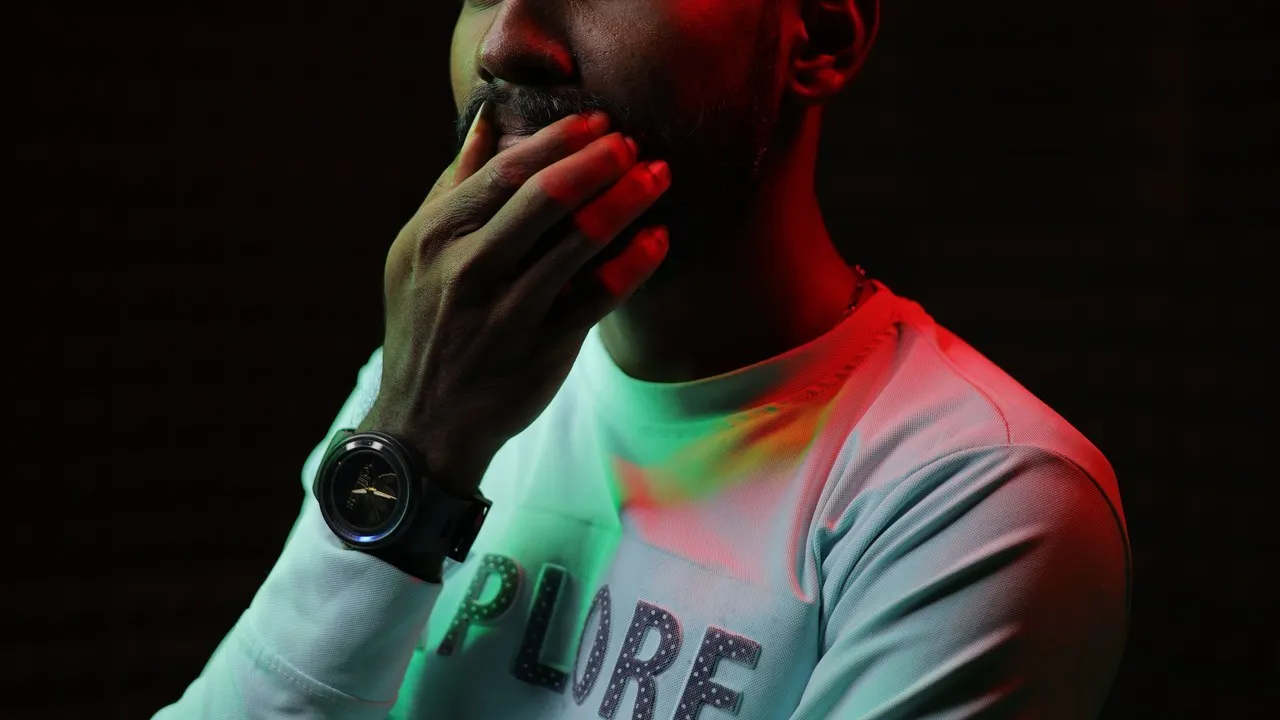
Long sleeve t shirt printing needs a placement plan built around the whole garment, not a short-sleeve layout stretched onto longer panels. Front, back, left sleeve, right sleeve, shoulder, and cuff graphics compete for attention, while seams, sleeve rotation, fabric movement, and fit can shift artwork away from the position shown in a flat mockup.
For a streetwear founder or POD team, that difference affects more than appearance. A misplaced sleeve print can look correct when flat but twist out of view when worn; a large body graphic can also overpower sleeve artwork or react differently to the fabric surface. The safer buying process is to choose the blank and print method together, map every location from garment landmarks, and approve the real product after printing and care testing. A universal placement number cannot replace a sample made from the selected garment, size, color, artwork, and process.
What Changes When Artwork Moves Onto Long Sleeves?
Artwork on a long-sleeve shirt must be planned for a curved, moving panel with visible seams and a changing orientation. The design should be judged on a person as well as on a flat garment because sleeve rotation, arm position, cuff depth, and fit determine what a customer actually sees.

Map the garment before scaling the artwork
Start with a placement map that names each intended location and the visual job it performs. A front graphic usually carries the first message. A back graphic can support a larger composition, while a sleeve can add a wordmark, repeating element, directional mark, or secondary illustration. If every location is treated as the focal point, the product can become crowded and expensive without gaining a clear visual hierarchy.
Mark the neckline, shoulder seam, sleeve head, underarm seam, side seam, cuff seam, and finished hem on the mockup. These landmarks are more useful than measuring from the edge of a product photo because the visible edge can change with folding or camera angle. The CottonWorks garment construction overview is a general reference for understanding how garment pieces and seams come together. Buyers still need the actual pattern and sample measurements for the selected long sleeve.
Orientation is a separate decision. Sleeve artwork may read from shoulder to cuff, cuff to shoulder, or across the arm. The correct direction depends on how the wearer is expected to present the garment and whether the mark should be readable with arms relaxed, raised, or photographed from the side. State the intended reading direction in the production file instead of expecting the printer to infer it from a rectangular artwork canvas.
Balance body and sleeve locations as one system
Create one composite mockup showing front, back, and both sleeves. Then remove locations until the hierarchy is obvious. When a large back graphic already reaches toward the shoulder blades, an upper-sleeve mark may visually collide with it. When the front is quiet, a longer sleeve composition can carry more of the concept. This is a design judgment, not proof that the proposed dimensions will print correctly.
Left and right sleeves should be specified independently. Mirroring the same file may reverse letters or symbols, while using identical orientation can make one sleeve read upside down from the intended viewpoint. Name the files by garment side, show the top of each design, and identify the sample size used for approval. A placement approved on one size may need a controlled adjustment for another because sleeve length and width do not always grade in the same proportion as the artwork.
Which Long Sleeve Blank Supports the Print Plan?
The right blank is the one whose fit, fabric surface, construction, and available print area support the intended artwork and selling position. Fabric weight alone cannot determine print quality or streetwear value, and a heavier number should not be treated as proof that every print method or placement will perform better.
Compare product direction before decoration
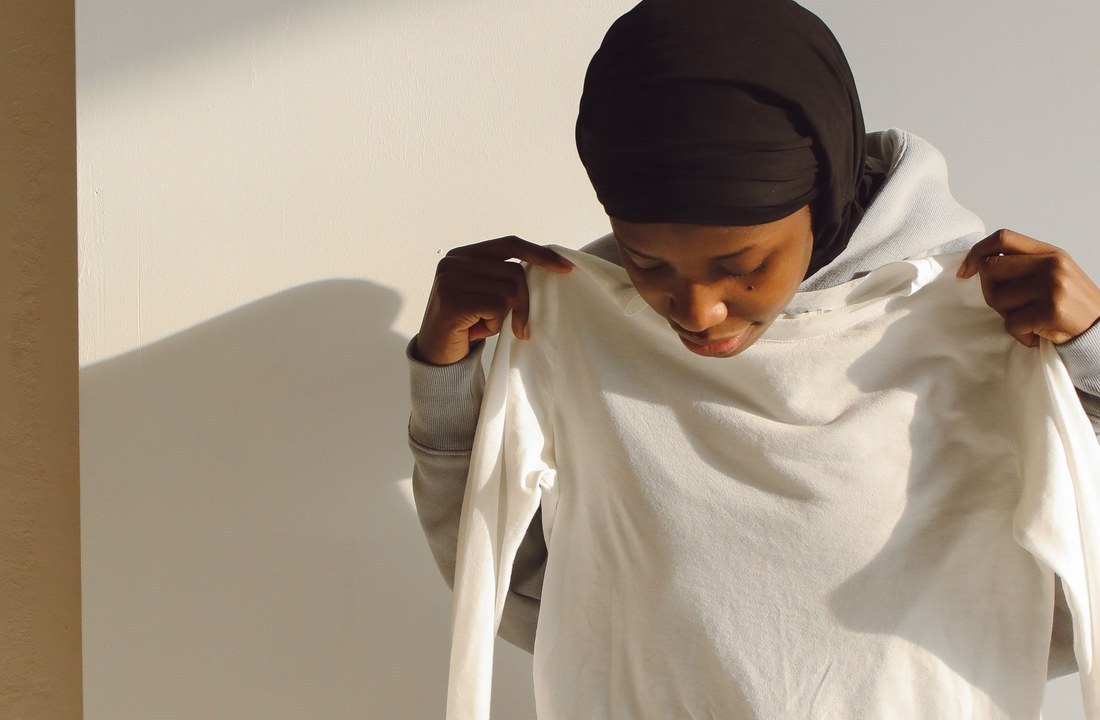
Use the Cloprod apparel catalog to shortlist products by category, then review the current product page rather than relying on a URL or an old task note. The 260GSM unisex long-sleeve jersey T-shirt is one named option for a unisex long-sleeve direction. Its 260GSM specification must not be described as lightweight without evidence from the current page or a comparison standard.
The 270GSM men's long-sleeve cotton T-shirt should be described according to its current product name, even though its URL contains “unisex.” A buyer should compare the actual size chart, silhouette, fabric details, color options, and construction shown for each product. The small difference in the stated GSM values does not prove that the two garments feel, fit, or print alike.
If the design depends on drape, a close body fit, an oversized shoulder, or a specific cuff proportion, approve those characteristics before placing artwork. A garment that is visually wrong when blank will not become the right product through decoration. The related T-shirt fabric selection guide can help frame fiber, surface, hand feel, and end-use questions, but the chosen long sleeve still requires its own product evidence.
Inspect the real print surface and construction
Look for rib texture, yarn character, stretch, surface hairiness, wash effects, seam bulk, and panel width where the artwork will sit. A smooth chest does not mean the sleeve has the same printing conditions. The sleeve may narrow toward the cuff, curve around the arm, or place an underarm seam close to the design. Rib cuffs are a different surface from jersey sleeves and should not be assumed to accept the same image detail or print feel.
Color also changes the decision. Dark garments may require an underbase or another production approach, while washed or intentionally varied surfaces can change perceived color and edge appearance. Request a sample in the intended garment color. A white sample cannot approve opacity, wash interaction, or contrast on a dark or treated product.
How Should Front Back and Sleeve Placements Be Planned?
Plan placements from stable garment landmarks and define each artwork file by garment side, orientation, scale, and intended visual relationship. Measurements should guide the sample, but the approved physical result should control production because fabric, size grading, seam shape, and print setup can alter the final position.
Use a placement map with decision fields
A useful map connects the creative request to something production can check. It should show the artwork revision, garment style and size, placement name, anchor landmark, print method, intended orientation, and approval status. Do not place one unlabeled front-and-back mockup in the tech pack and expect it to authorize two sleeves.
The table below separates common locations by the question each one must answer. It does not prescribe universal dimensions.
| Placement | Primary decision | Main production risk | Sample check |
|---|---|---|---|
| Front body | How does the graphic relate to neckline, width, and fit? | Artwork appears too high, low, or wide when worn | View flat and on-body in the approved size |
| Back body | Should it lead the design or support the front? | Collision with shoulder area, hooded layers, or side seams | Check scale and visibility in the intended outfit |
| Upper sleeve | Should it face forward, outward, or toward the back? | Rotation moves the mark away from the viewing angle | Inspect with arms relaxed and moving |
| Full sleeve | How should the design follow a tapered panel? | Distortion, seam interference, or uneven spacing | Check both sleeve sides and the full worn silhouette |
| Cuff area | Is the artwork on jersey or rib, and is it readable? | Small detail closes up or the cuff seam interrupts it | Inspect stretch, edge clearance, and hand feel |
This map becomes especially important when more than one location uses the same visual element. Repeated marks should look intentionally related, but identical digital dimensions may not create equal visual weight on a broad chest and a narrow sleeve. Compare perceived scale on the garment rather than forcing every file to match numerically.
Keep critical artwork away from uncertain boundaries
Seams, cuffs, folds, and print-equipment limits create boundaries that may not be clear in a product image. Ask the printer whether the proposed artwork can be held flat in the intended location and what area cannot be printed consistently. If a design deliberately crosses a seam, treat that as a special construction and sampling question rather than a standard placement.
Small text, thin lines, registration-dependent colors, and long geometric elements make shifts more visible. A loose organic graphic may tolerate slight garment movement; a straight wordmark running down the arm can make rotation or skew obvious. Buyers should identify which edges, baselines, and relationships are critical so quality control does not treat every minor variation as equal.
Which Printing Method Fits the Fabric and Artwork?
The printing method should be selected after reviewing garment fabric, color, stretch, surface, artwork detail, placement, order quantity, and required hand feel. DTG, DTF, and screen printing can each be appropriate for long sleeve t shirt printing, but none is suitable for every combination of panel shape and design.
Match the process to the highest-risk location
DTG can support detailed artwork on compatible cotton-rich surfaces, but the buyer should confirm pretreatment, color behavior, printable area, and the actual garment construction. DTF can handle many graphic styles and garment colors, yet transfer feel, edge appearance, stretch, and placement access still need evaluation. Screen printing can suit repeat production and strong spot-color work, while setup, color count, registration, and small-batch economics may affect the choice.
Do not choose a process only from the front graphic. A method available for the body may be difficult near a cuff or along a narrow sleeve. If the order combines chest, back, and two sleeve placements, request a process recommendation for each location and confirm whether multiple methods would create an acceptable difference in texture and appearance.
Artwork preparation should follow the selected method. Keep vector elements where appropriate, provide raster art at the requested final-size resolution, define colors, identify transparent areas, and avoid hiding the intended scale inside a larger canvas. Supply separate files for each placement and a labeled composite view. The mockup communicates intent; the production file must communicate the printable artwork.
Judge print feel as part of the product offer
A large sleeve transfer may be visually accurate but feel restrictive if it covers an area that bends and stretches. A heavy ink deposit can also change the perceived drape of a softer garment. These outcomes depend on process, coverage, fabric, curing, and artwork, so they must be examined on the intended sample.
Ask whether the garment needs washing, finishing, or printing first, and whether the order of operations can change placement or appearance. A washed garment may vary visually from one unit to another; printing before a later treatment can create another effect and another risk. The supplier should identify the proposed sequence rather than using “vintage,” “soft,” or “durable” as an unchecked promise.
What Must the Printed Sample Prove?
The printed sample must prove the actual combination of blank, size, color, artwork revision, placement, method, and finishing direction. A digital mockup can approve composition, but it cannot prove sleeve rotation, hand feel, opacity, seam clearance, curing, wash appearance, or repeatability.
Approve placement on a real worn garment
Inspect the sample flat first. Confirm that the product identity, color, artwork revision, left and right sleeve files, orientation, and print locations match the order. Then put it on a person whose measurements are understood relative to the sample size. Photograph front, back, and both side views with arms relaxed, extended, and bent so the team can see where each graphic moves.
Check the relationship between placements. A sleeve mark that looks balanced alone may sit too close to a chest graphic when the arm rests beside the body. Long artwork should be reviewed from shoulder to cuff for rotation and distance from the underarm seam. Cuff-area work should be checked with the cuff in its normal wearing position, not only flattened on a table.
Record approval with annotated photographs and the exact artwork files. “Looks good” is not a production standard. Note any adjustment to orientation, perceived scale, seam clearance, or location and require a revised confirmation before bulk work. If one sleeve is different from the other, the approval record must show both.
Test the risks that matter for customer use
The CottonWorks quality testing guidance groups textile checks by properties such as appearance, dimensional stability, colorfastness, and strength. Use it to identify relevant questions, not to claim that a garment has passed a test. The brand and supplier should agree on the test method, care conditions, acceptance limit, and responsible party.
Dimensional change can alter the relationship between artwork and garment landmarks. The CottonWorks shrinking and skewing resource explains the broader fabric behavior behind those risks. If the sleeve twists or the body changes shape after care, a previously straight print can appear misaligned even when the printed film itself remains intact.
Where formal methods are required, buyers can consult the AATCC standard test methods and procedures and select the applicable current method with a qualified laboratory or supplier. Do not cite a standard number without confirming its current title, scope, and conditions. For a commercial sample review, document cracking, peeling, color change, staining, surface change, print feel, seam behavior, and garment measurements under the agreed care cycle.
Bulk approval should also define comparison evidence. Retain the sample, artwork revisions, product specification, placement map, photographs, and test notes. If the garment, fabric, color, print method, artwork scale, placement, or finishing sequence changes, decide whether a new sample is required before production continues.
Conclusion
Long sleeve t shirt printing succeeds when blank selection, artwork hierarchy, placement, and production method are approved as one product. Begin with a garment map, assign a clear role to every body and sleeve graphic, and specify side, orientation, anchor landmark, artwork revision, and sample size. Compare long-sleeve products by actual fit, fabric, construction, and available print area rather than treating GSM as a quality ranking.
Before ordering, approve the real printed garment flat and on-body, then record the checks that matter after care. Submit the intended garment, sizes, colors, artwork files, front and back scale, separate sleeve files, print locations, quantity, target delivery date, and packaging requirements through Cloprod's custom apparel printing options. The quotation and sample plan should identify any location that needs a different process or renewed approval.
FAQ
Can the same artwork size be used on every long-sleeve size?
Sometimes, but it should not be assumed. Sleeve width and length can grade differently across sizes, changing perceived scale and seam clearance. Approve the reference size, identify the intended size range, and ask whether artwork or placement needs controlled adjustment.
Is DTG or DTF better for sleeve printing?
It depends on the fabric, garment color, artwork, print area, stretch, desired hand feel, and production setup. Ask for a recommendation for the exact sleeve location and approve the result on the selected garment. A front-print result does not automatically approve a sleeve.
Can a sleeve print cross the underarm seam?
Only if the supplier confirms a suitable production route and the sample proves the intended appearance. Seam bulk and panel handling can interrupt the graphic or reduce repeatability. Treat seam-crossing artwork as a special request, not a normal placement.
Does a digital mockup approve print placement?
No. It approves visual intent and should show all sides, but it cannot prove scale, rotation, print feel, seam clearance, or movement when worn. Use it to prepare the sample, then approve annotated photographs and the physical result.
What should be included in a long-sleeve printing quote request?
Provide the garment link or specification, colors, size quantities, final artwork for each location, intended dimensions and orientation, print method if known, packaging, destination, and target delivery date. Ask the supplier to identify quote exclusions and any placement that needs another method or sample.