%20-%20https://sketch.com%20--%3e%3ctitle%3eT-shirts备份%202%3c/title%3e%3cdesc%3eCreated%20with%20Sketch.%3c/desc%3e%3cg%20id='T-shirts备份-2'%20stroke='none'%20stroke-width='1'%20fill='none'%20fill-rule='evenodd'%20transform='translate(0.000000,%201.000000)'%3e%3cg%20id='编组'%20transform='translate(1.000000,%2010.607599)'%20stroke='%23333333'%20stroke-width='2'%3e%3cpath%20d='M24.7506037,2.40561696%20L24.4109858,2.94791681%20C23.1539677,5.92351386%2021.831857,6.92184787%2018.472318,6.92184787%20C15.0918065,6.92184787%2013.7880665,5.90817694%2012.5599904,2.88704991%20C12.3847844,2.4561805%2012.0176189,2.13892356%2011.5768399,2.03613378%20C11.1481647,1.93340907%2010.6944147,2.05271913%2010.3590373,2.35903823%20L2.14473535,9.86550133%20C0.720776712,11.1696549%200.606481197,13.4202167%201.87710556,14.8789444%20L2.07276829,15.0840278%20C2.25830914,15.270309%202.47988147,15.4396542%202.72897579,15.5864188%20L7.32818819,18.2773511%20L7.28090871,18.9005194%20L6.25354816,32.4414343%20C6.21073375,32.9642561%206.44784527,33.473791%206.86639235,33.7641227%20C10.1405412,36.0536646%2013.3721888,37%2018.5296327,37%20C23.6951097,37%2026.9045107,36.0489513%2030.1280064,33.7695522%20L30.283246,33.6433265%20C30.6132328,33.3345129%2030.7846536,32.871259%2030.7355391,32.4039313%20L29.3432358,18.2472635%20L29.9205868,17.9293432%20L34.180155,15.5837978%20C35.172928,15.0358955%2035.8462157,14.0242248%2035.9766588,12.8762784%20C36.1078384,11.7218503%2035.6805042,10.5744842%2034.8363688,9.80961913%20L26.6326031,2.35780292%20C26.2994807,2.05668927%2025.8445706,1.93608725%2025.4144091,2.03482553%20C25.1685409,2.08962871%2024.9357839,2.22011465%2024.7506037,2.40561696%20Z'%20id='路径'%20fill-rule='nonzero'%3e%3c/path%3e%3cpath%20d='M32.0227213,7.12706337%20C34.1435585,6.79908718%2035.5589604,6.0103637%2036.2689268,4.76089296%20C36.7450972,3.92288014%2037.1241904,3.15623869%2037.4062064,2.46096862%20C37.6137918,1.94917626%2038.1969662,1.70257588%2038.7087556,1.91016839%20C38.8174691,1.95426485%2038.9175753,2.01714687%2039.0044951,2.09593814%20L47.0583283,9.39659336%20L47.7193116,10.1076368%20C49.0578159,11.5475138%2048.9756371,13.7998368%2047.5357601,15.1383411%20C47.3875203,15.2761442%2047.2277976,15.4010531%2047.0583283,15.5117097%20L41.9602936,18.3560999%20L43.2627471,32.7848946%20C43.2911962,33.0999871%2043.168856,33.4099546%2042.932878,33.6206843%20C42.6875325,33.8397791%2042.4886172,34.0097554%2042.3361319,34.1306133%20C39.7263264,36.1991123%2036.3979867,37.2333618%2032.3511128,37.2333618%20C28.7945467,37.2333618%2026.1316404,36.9623653%2024.3623939,36.4203724'%20id='路径-2'%20stroke-linecap='round'%3e%3c/path%3e%3c/g%3e%3cpath%20d='M33.4666494,4%20C32.7228105,4%2032.5,6.59294054%2031.8988718,7.11217576%20C31.2977436,7.63141098%2029.4332988,7.40648891%2029.4332988,8.12452017%20C29.4332988,8.84255143%2031.2477079,9.14206726%2031.8988718,9.8748333%20C32.5500357,10.6075994%2032.7509178,13.450957%2033.4666494,13.450957%20C34.182381,13.450957%2034.3969063,10.4640601%2034.8062404,9.8748333%20C35.2155745,9.28560653%2037.2689268,8.78824215%2037.2689268,8.12452017%20C37.2689268,7.46079818%2035.2474011,7.64545819%2034.8062404,7.11217576%20C34.3650797,6.57889333%2034.2104883,4%2033.4666494,4%20Z'%20id='路径-14'%20fill='%23333333'%3e%3c/path%3e%3c/g%3e%3c/svg%3e)
'%20stroke-linejoin='round'%3e%3cg%20id='编组'%20transform='translate(9.000000,%207.000000)'%20fill-rule='nonzero'%20stroke='%23333333'%20stroke-width='2'%3e%3cpath%20d='M31.6580999,-0.102439008%20C30.5100269,2.18823585%2030.0542426,5.67474993%2030.3587763,9.42418424%20C30.6822663,13.3951973%2031.8077846,17.2494259%2033.4717621,19.9872374%20L33.4717621,19.9872374%20L33.4717621,40.5126294%20L-1,40.5126294%20L-1,19.9934791%20C0.658093371,17.2553578%201.78946921,13.4009517%202.11296635,9.42985083%20C2.41752353,5.68012736%201.96173463,2.19367658%200.813663539,-0.0970116329%20L0.813663539,-0.0970116329%20L8.12511393,-0.0970116329%20C7.93029031,2.82458939%208.80601437,5.51057742%2010.5050219,7.35259165%20C11.911224,8.87715484%2013.8817335,9.80794816%2016.2358811,9.80794816%20C18.5896257,9.80794816%2020.5597831,8.8761884%2021.9658812,7.35090274%20C23.6654197,5.50730309%2024.5415191,2.81937778%2024.3466448,-0.102439008%20L24.3466448,-0.102439008%20Z'%20id='路径'%3e%3c/path%3e%3cline%20x1='0'%20y1='35.5434153'%20x2='33.3493773'%20y2='35.5434153'%20id='路径-5'%3e%3c/line%3e%3cpath%20d='M7.02092154,-7.10542736e-15%20C10.1319066,2.93766424%2013.2035597,4.40649636%2016.2358811,4.40649636%20C19.2682024,4.40649636%2022.2974375,2.93766424%2025.3235864,-7.10542736e-15'%20id='路径-7'%20stroke-linecap='round'%3e%3c/path%3e%3cpath%20d='M31.4953977,2.63284558%20L36.4771799,2.61608223%20C35.6927912,8.39179041%2036.7632888,14.5260803%2039.6886728,21.018952%20L39.6886728,39.4218217%20L34.3249871,39.4218217'%20id='路径-9'%20stroke-linecap='round'%3e%3c/path%3e%3c/g%3e%3c/g%3e%3c/svg%3e)
'%3e%3cpath%20d='M19.7354789,3.20880828%20C19.7605297,5.17861174%2020.6448662,6.94071017%2022.0295594,8.13965347%20C23.1932709,9.14725872%2024.711067,9.75671011%2026.3711606,9.75671011%20C28.0312542,9.75671011%2029.5490503,9.14725872%2030.7127618,8.13965347%20C31.8921595,7.11846622%2032.7085685,5.68873246%2032.9402054,4.07008582%20C32.9791132,3.79820377%2033.0006898,3.52681041%2033.0059749,3.25726284%20C33.3088406,3.22718757%2033.6170537,3.21177646%2033.9300294,3.21174794%20C36.1624168,3.21154457%2038.1526409,3.99399935%2039.6884369,5.29843532%20C41.2675336,6.63964892%2042.3676941,8.53665197%2042.7454691,10.7166588%20L42.7454691,10.7166588%20L46.1709196,41.7693318%20C46.247944,42.3321697%2046.0859691,42.8829051%2045.7084154,43.3183964%20C45.3612167,43.722187%2044.8663578,43.9753491%2044.3260734,44.0229386%20L44.3260734,44.0229386%20L39.8040277,44.0310553%20C39.3781173,44.0310553%2038.9829429,43.8965525%2038.6635982,43.6700095%20C38.3024986,43.4138456%2038.038002,43.0403296%2037.9249985,42.6039024%20L37.9249985,42.6039024%20L37.6832738,41.0277321%20C37.0157385,42.0213966%2035.9570908,42.6391292%2034.7706802,42.7062063%20L34.7706802,42.7062063%20L16.8781526,42.7122292%20C15.6665116,42.7122292%2014.5474319,42.1274244%2013.8744406,41.1564779%20L13.8744406,41.1564779%20L13.5787457,42.5263987%20C13.4931715,42.9254624%2013.2806044,43.2768413%2012.9822705,43.540301%20C12.6774394,43.8094984%2012.2828471,43.9856112%2011.8527165,44.0228058%20L11.8527165,44.0228058%20L7.2966742,44.0301767%20C6.68507413,44.0301767%206.11615304,43.7675926%205.72859965,43.3188465%20C5.38697876,42.9229494%205.22291954,42.434758%205.24956026,41.9304278%20L5.24956026,41.9304278%20L9.114459,10.9787644%20C9.43354023,8.78714507%2010.4574643,6.866184%2011.9617204,5.48365114%20C13.439357,4.12558378%2015.381771,3.28220853%2017.5931807,3.21561749%20L17.5931807,3.21561749%20Z'%20id='形状结合'%20stroke='%23333333'%20stroke-width='2'%20stroke-linejoin='round'%20fill-rule='nonzero'%3e%3c/path%3e%3cline%20x1='14.9471931'%20y1='16.0295055'%20x2='13.8670819'%20y2='43.1333598'%20id='路径-2'%20stroke='%23333333'%20stroke-width='2'%20stroke-linejoin='round'%20fill-rule='nonzero'%3e%3c/line%3e%3cline%20x1='37.6587671'%20y1='16.0295055'%20x2='36.567858'%20y2='43.1333598'%20id='路径-2备份'%20stroke='%23333333'%20stroke-width='2'%20stroke-linejoin='round'%20fill-rule='nonzero'%20transform='translate(37.113313,%2029.581433)%20scale(-1,%201)%20translate(-37.113313,%20-29.581433)%20'%3e%3c/line%3e%3cpath%20d='M4.14236007,0%20C3.37841745,0%203.14958501,2.66302001%202.53221008,3.19628862%20C1.91483515,3.72955722%200,3.49855617%200,4.23599369%20C0,4.9734312%201.86344714,5.28104205%202.53221008,6.03361258%20C3.20097302,6.78618312%203.4072844,9.70638822%204.14236007,9.70638822%20C4.87743575,9.70638822%205.09775907,6.6387644%205.51815625,6.03361258%20C5.93855342,5.42846076%208.04740171,4.9176541%208.04740171,4.23599369%20C8.04740171,3.55433327%205.97124022,3.74398409%205.51815625,3.19628862%20C5.06507227,2.64859315%204.9063027,0%204.14236007,0%20Z'%20id='路径-14'%20fill='%23333333'%3e%3c/path%3e%3cline%20x1='6.44444444'%20y1='38.3089431'%20x2='13.2552553'%20y2='38.3089431'%20id='路径-3'%20stroke='%23333333'%20stroke-width='2'%20stroke-linejoin='round'%20fill-rule='nonzero'%3e%3c/line%3e%3cline%20x1='38'%20y1='38.3089431'%20x2='45.8108108'%20y2='38.3089431'%20id='路径-3备份'%20stroke='%23333333'%20stroke-width='2'%20stroke-linejoin='round'%20fill-rule='nonzero'%3e%3c/line%3e%3c/g%3e%3c/g%3e%3c/svg%3e)
'%3e%3cpath%20d='M34.9261439,0%20C34.1622012,0%2033.9333688,2.66302001%2033.3159939,3.19628862%20C32.6986189,3.72955722%2030.7837838,3.49855617%2030.7837838,4.23599369%20C30.7837838,4.9734312%2032.6472309,5.28104205%2033.3159939,6.03361258%20C33.9847568,6.78618312%2034.1910682,9.70638822%2034.9261439,9.70638822%20C35.6612195,9.70638822%2035.8815429,6.6387644%2036.30194,6.03361258%20C36.7223372,5.42846076%2038.8311855,4.9176541%2038.8311855,4.23599369%20C38.8311855,3.55433327%2036.755024,3.74398409%2036.30194,3.19628862%20C35.8488561,2.64859315%2035.6900865,0%2034.9261439,0%20Z'%20id='路径-14'%20fill='%23333333'%3e%3c/path%3e%3cpath%20d='M18.4864865,7.18963854%20C15.4758095,7.17353458%2011.6765338,8.43151301%209.29444611,11.1321905%20C6.91235846,13.832868%201.25126095,20.2672047%200.387510052,31.5103084%20C-0.188323879,39.0057108%20-0.122397588,42.4815693%200.585288924,41.9378837%20L5.35517862,43.1351351%20C6.49874742,42.6940382%207.11008428,41.3246688%207.18918919,39.027027%20C10.964873,40.352122%2014.7306388,40.9373335%2018.4864865,40.7826614%20C22.2423342,40.6279893%2026.0080999,40.0943847%2029.7837838,39.1818475%20C30.1353835,41.4550539%2030.9437088,42.7728164%2032.2087597,43.1351351%20L35.97522,42.1868999%20C37.082045,41.6368999%2037.2680046,38.0780361%2036.5330988,31.5103084%20C35.4307401,21.6587169%2030.3374081,13.8085547%2027.6629466,11.1321905%20C24.9884851,8.45582629%2021.4971635,7.2057425%2018.4864865,7.18963854%20Z'%20id='路径-2'%20stroke='%23333333'%20stroke-width='2'%20stroke-linejoin='round'%20fill-rule='nonzero'%3e%3c/path%3e%3cpath%20d='M30.4824021,39.027027%20C29.7361521,36.2882883%2029.7873366,33.5495495%2030.6359556,30.8108108'%20id='路径-4'%20stroke='%23333333'%20stroke-width='2'%20stroke-linecap='round'%20stroke-linejoin='round'%20fill-rule='nonzero'%20transform='translate(30.297297,%2034.918919)%20scale(-1,%201)%20translate(-30.297297,%20-34.918919)%20'%3e%3c/path%3e%3cpath%20d='M18.5081607,1.02702703%20C23.5904804,1.02702703%2028.8837764,7.80750772%2027.5089127,10.5572351%20C26.1340491,13.3069625%2011.044553,13.6315238%209.50740862,10.5572351%20C7.97026429,7.48294643%2013.4258409,1.02702703%2018.5081607,1.02702703%20Z'%20id='矩形'%20stroke='%23333333'%20stroke-width='2'%20stroke-linejoin='round'%20fill-rule='nonzero'%3e%3c/path%3e%3cpath%20d='M14.2487482,28.9937363%20C14.9334329,27.7204903%2015.1527269,26.6144701%2014.9066303,25.6756757%20L22.1744145,25.6756757%20C22.1611041,26.952086%2022.3983129,28.0581062%2022.8860409,28.9937363%20C23.3737689,29.9293664%2024.1722123,30.8774003%2025.2813711,31.8378378%20L24.6486486,35.9459459%20C22.5945946,36.4426461%2020.5405405,36.6909962%2018.4864865,36.6909962%20C16.4324324,36.6909962%2014.3783784,36.4426461%2012.3243243,35.9459459%20L11.6895463,31.8378378%20C12.7109962,31.2150162%2013.5640635,30.2669823%2014.2487482,28.9937363%20Z'%20id='矩形'%20stroke='%23333333'%20stroke-width='2'%20stroke-linecap='round'%20stroke-linejoin='round'%20fill-rule='nonzero'%3e%3c/path%3e%3cpath%20d='M6.8607805,39.027027%20C6.11453049,36.2882883%206.16571499,33.5495495%207.014334,30.8108108'%20id='路径-4'%20stroke='%23333333'%20stroke-width='2'%20stroke-linecap='round'%20stroke-linejoin='round'%20fill-rule='nonzero'%3e%3c/path%3e%3c/g%3e%3c/g%3e%3c/svg%3e)
'%20fill-rule='nonzero'%20stroke='%23333333'%20stroke-width='2'%3e%3cpath%20d='M30.2050905,-0.0716765239%20C30.6708724,-0.020568619%2031.0989537,0.0686601335%2031.483746,0.196177499%20C33.6750695,0.92236607%2036.250887,3.48295379%2038.4018553,7.23671243%20C40.2937276,10.5383101%2041.8772238,14.7414509%2042.6174967,19.2400665%20C43.3015193,23.3968505%2043.7565804,28.9686602%2043.9784178,35.9547829%20C44.0400516,36.4969187%2043.8781366,37.0250522%2043.5140054,37.4450611%20C43.2062203,37.8030139%2042.7813981,38.041594%2042.3119771,38.1218049%20L42.3119771,38.1218049%20L37.9607078,39.444336%20C37.4726975,39.4862166%2037.0161903,39.348771%2036.6566164,39.0936894%20C36.3026307,38.8425722%2036.0422434,38.4777692%2035.9279386,38.0514231%20L35.9279386,38.0514231%20L35.6512065,36.5336709%20C35.0300844,37.3677575%2030.555744,39.4518537%2024.4058776,39.4509091%20C18.2992611,39.4499711%2014.4288377,37.4473381%2013.778979,36.6481801%20L13.778979,36.6481801%20L13.4946346,37.9590944%20C13.409733,38.3550217%2013.1988587,38.7036554%2012.9028653,38.9650483%20C12.5531444,39.2738881%2012.0843057,39.4592101%2011.5795724,39.4506141%20L11.5795724,39.4506141%20L6.83733744,37.7838851%20C6.30688108,37.734067%205.8219314,37.4841832%205.47966262,37.0878719%20C5.10475105,36.6533949%204.94361938,36.1075601%205.01987087,35.5487108%20C5.87952927,27.1575901%206.62275357,21.5194236%207.24381867,18.6331488%20C8.15689051,14.3898316%2010.0567274,9.62710944%2012.2478489,6.01913378%20C14.4198269,2.44268049%2016.9155321,0.126020223%2019.0038476,-0.0341941814%20C19.3349904,-0.059599273%2019.684528,-0.0329792934%2020.048933,0.0426727475%20C20.0485026,0.322038007%2020.0587709,0.606972386%2020.0781127,0.89613626%20C20.1906468,2.57854425%2020.5885245,4.07814763%2021.5538567,5.09082243%20C22.3562527,5.93257014%2023.5496125,6.39100896%2025.2079599,6.39100896%20C26.8232274,6.39100896%2027.9750703,5.95750793%2028.7455387,5.15028431%20C29.680592,4.17062417%2030.0530617,2.7130328%2030.1717874,1.07319992%20C30.200092,0.68225832%2030.2126331,0.299489175%2030.2050905,-0.0716765239%20Z'%20id='形状结合'%3e%3c/path%3e%3cpath%20d='M19.5133106,0%20C21.3811567,1.7116825%2022.6015035,2.13363743%2025.1288966,2.13363743%20C27.6562896,2.13363743%2028.7112206,1.7116825%2031.0265736,0'%20id='路径-7'%20stroke-linecap='round'%3e%3c/path%3e%3cpath%20d='M14.2776845,37.1340996%20C13.4265244,34.2247524%2013.6221502,31.1532826%2014.63166,28.1550842'%20id='路径-4'%20stroke-linecap='round'%3e%3c/path%3e%3cpath%20d='M35.6114473,37.1340996%20C34.7602872,34.2247524%2034.955913,31.1532826%2035.9654228,28.1550842'%20id='路径-4备份'%20stroke-linecap='round'%20transform='translate(35.520490,%2032.644592)%20scale(-1,%201)%20translate(-35.520490,%20-32.644592)%20'%3e%3c/path%3e%3cpath%20d='M15.6089327,1.73235424%20C14.8279907,1.73235424%2013.5856023,1.15490283%2011.8817673,-5.68434189e-14%20C5.88636871,6.20145775%202.28312945,13.1925875%201.07204948,20.9733893%20C-0.139030491,28.754191%20-0.190632326,32.961664%200.917243972,33.5958082%20L4.99556447,35.210175'%20id='路径-2'%20stroke-linecap='round'%3e%3c/path%3e%3c/g%3e%3cpath%20d='M25.5592019,34.3180607%20C26.2438866,33.0448147%2026.4631806,31.9387944%2026.217084,31%20L33.4848682,31%20C33.4715578,32.2764103%2033.7087666,33.3824305%2034.1964946,34.3180607%20C34.6842225,35.2536908%2035.4826659,36.2017246%2036.5918248,37.1621622%20L35.9591023,41.2702703%20C33.9050483,41.7669705%2031.8509942,42.0153206%2029.7969402,42.0153206%20C27.7428861,42.0153206%2025.6888321,41.7669705%2023.634778,41.2702703%20L23,37.1621622%20C24.0214499,36.5393405%2024.8745172,35.5913066%2025.5592019,34.3180607%20Z'%20id='矩形'%20stroke='%23333333'%20stroke-width='2'%20stroke-linecap='round'%20fill-rule='nonzero'%3e%3c/path%3e%3c/g%3e%3c/svg%3e)
'%20fill-rule='nonzero'%20stroke='%23333333'%20stroke-linejoin='round'%20stroke-width='2'%3e%3cpath%20d='M23.9621848,47.8189278%20C23.5302392,47.8189278%2023.1846827,47.5165659%2023.0982935,47.0846203%20L19.2107828,24.2778909%20L15.3232721,47.0846203%20C15.236883,47.5165659%2014.8913265,47.8189278%2014.4593809,47.8189278%20L1.26379866,47.8189278%20C1.00463128,47.8189278%200.788658489,47.7325387%200.615880175,47.5165659%20C0.44310192,47.3437877%200.356712793,47.0846203%200.399907386,46.8254529%20C1.6957443,32.7872199%204.15783439,5.79061781%204.15783439,4.23561352%20L4.15783439,3.5445005%20L4.15783439,1.29838325%20C4.15783439,0.823243081%204.54658544,0.434491979%205.02172561,0.434491979%20L33.8629155,0.434491979%20C34.3380556,0.434491979%2034.7268067,0.823243022%2034.7268067,1.29838325%20L34.7268067,4.14922439%20C35.4611143,9.4189611%2038.35515,45.3136432%2038.4847338,46.8254529%20C38.4847338,47.0846203%2038.4415392,47.3005931%2038.2687609,47.5165659%20C38.0959826,47.6893442%2037.8800099,47.8189278%2037.6208425,47.8189278%20L23.9621848,47.8189278%20Z'%20id='路径'%3e%3c/path%3e%3cpath%20d='M12.2091913,7.64705882%20C13.2588301,14.6696078%2010.1386094,18.1808824%202.84852941,18.1808824'%20id='路径-8'%3e%3c/path%3e%3cpath%20d='M36.6606619,7.64705882%20C37.7103006,14.6696078%2034.59008,18.1808824%2027.3,18.1808824'%20id='路径-8备份'%20transform='translate(32.079412,%2012.913971)%20scale(-1,%201)%20translate(-32.079412,%20-12.913971)%20'%3e%3c/path%3e%3cline%20x1='4.36015661'%20y1='6.85020053'%20x2='35.4250589'%20y2='6.85020053'%20id='路径-7'%3e%3c/line%3e%3cline%20x1='22.9411765'%20y1='43.0147059'%20x2='38.2352941'%20y2='43.0147059'%20id='路径-3备份'%3e%3c/line%3e%3cline%20x1='0.955882353'%20y1='43.0147059'%20x2='16.25'%20y2='43.0147059'%20id='路径-3备份-2'%3e%3c/line%3e%3c/g%3e%3cpath%20d='M6.14236007,5%20C5.37841745,5%205.14958501,7.66302001%204.53221008,8.19628862%20C3.91483515,8.72955722%202,8.49855617%202,9.23599369%20C2,9.9734312%203.86344714,10.281042%204.53221008,11.0336126%20C5.20097302,11.7861831%205.4072844,14.7063882%206.14236007,14.7063882%20C6.87743575,14.7063882%207.09775907,11.6387644%207.51815625,11.0336126%20C7.93855342,10.4284608%2010.0474017,9.9176541%2010.0474017,9.23599369%20C10.0474017,8.55433327%207.97124022,8.74398409%207.51815625,8.19628862%20C7.06507227,7.64859315%206.9063027,5%206.14236007,5%20Z'%20id='路径-14'%20fill='%23333333'%3e%3c/path%3e%3c/g%3e%3c/svg%3e)
'%20fill-rule='nonzero'%20stroke='%23333333'%20stroke-width='2'%3e%3cpath%20d='M33.0403779,3.78231646%20C33.3707049,3.78231646%2033.6611649,4.12340341%2033.7295084,4.6094523%20C33.9402343,6.02496304%2034.1224837,11.3518882%2034.3104284,12.7759262%20L34.3104284,12.7759262%20L34.2695566,12.7765763%20C35.9295803,22.1661353%2036.8219297,30.5371284%2036.5177248,40.2716845%20L36.5177248,40.2716845%20L36.4949436,41.0291585%20L20.6164655,41.0291585%20L18.3311855,27.8254864%20C18.2913184,27.546417%2017.8926479,27.546417%2017.8527808,27.8254864%20L17.8527808,27.8254864%20L16.0602308,41.0291585%20L0.181752703,41.0291585%20L0.158971523,40.2716845%20C-0.146886806,30.6582401%200.297947405,22.3663342%201.86201358,13.1114332%20L1.91967082,12.7759262%20C2.10761547,11.3518882%202.28986491,6.02496304%202.50059073,4.6094523%20C2.57462954,4.12340341%202.85939423,3.78231646%203.18972123,3.78231646%20L3.18972123,3.78231646%20Z'%20id='形状结合'%3e%3c/path%3e%3cpath%20d='M9.07993884,12.1521737%20C10.0037613,17.7608692%207.25754983,20.5652169%200.841304326,20.5652169'%20id='路径-8'%3e%3c/path%3e%3cpath%20d='M35.1603729,12.1521737%20C36.0841954,17.7608692%2033.3379839,20.5652169%2026.9217384,20.5652169'%20id='路径-8备份'%20transform='translate(31.128260,%2016.358695)%20scale(-1,%201)%20translate(-31.128260,%20-16.358695)%20'%3e%3c/path%3e%3cline%20x1='17.9014823'%20y1='11.588091'%20x2='17.9014823'%20y2='19.9970733'%20id='路径-2'%20stroke-linecap='round'%3e%3c/line%3e%3cline%20x1='2.3484169'%20y1='11.588091'%20x2='34.3104284'%20y2='11.588091'%20id='路径-7'%3e%3c/line%3e%3cline%20x1='33.8721372'%20y1='9.34782609'%20x2='39.4402724'%20y2='9.34782609'%20id='路径-7备份'%3e%3c/line%3e%3cpath%20d='M37.5114243,38.2801333%20L42.0652174,38.2801333%20C42.8222165,31.1294628%2042.0652174,19.9970733%2039.7482269,10.8705978%20L38.8648884,0.904789217%20C38.8243442,0.420447683%2038.4193994,0.0479844782%2037.9333638,0.0479844782%20L9.67260658,0.0479844782%20C9.1563404,0.0479844782%208.73782397,0.466500908%208.73782397,0.982767087%20L8.73782397,3.73913043'%20id='路径-10'%3e%3c/path%3e%3c/g%3e%3c/g%3e%3c/svg%3e)


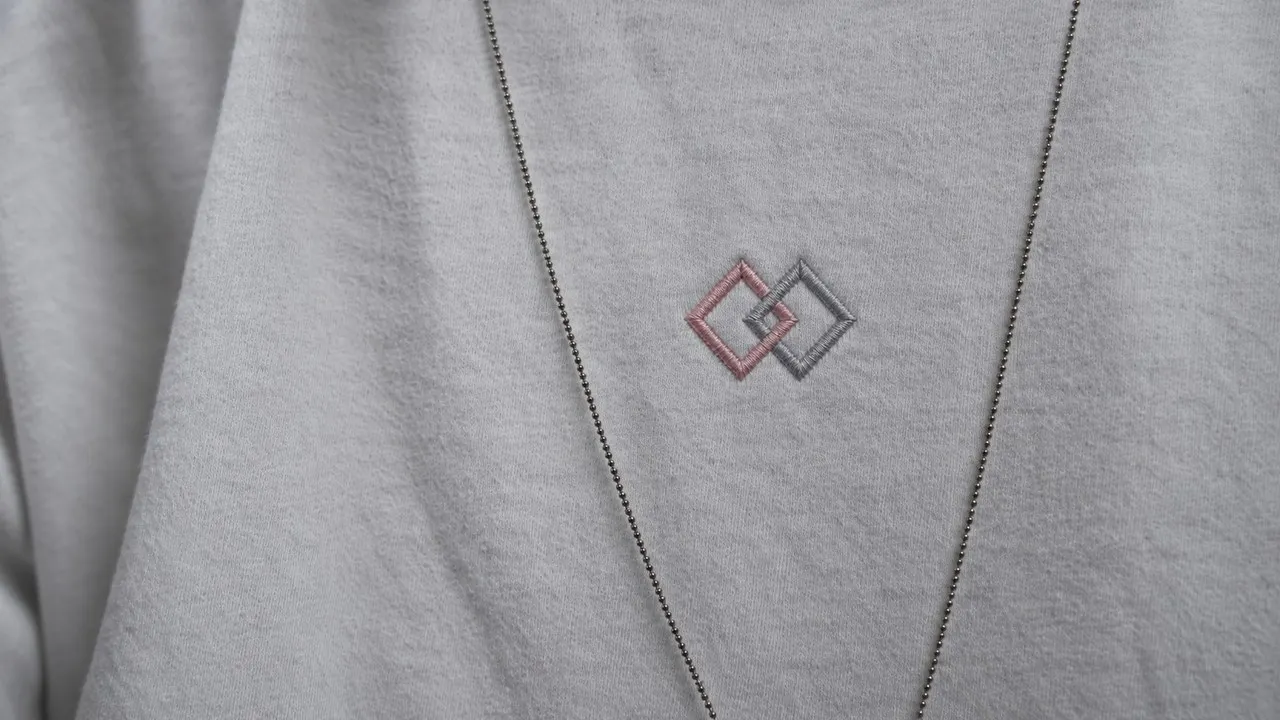
To digitize logo for embroidery production, a brand must approve more than a converted file. The decisive checks are the logo at its final sewn size, the stitch plan, thread colors, garment and backing combination, placement, a sew-out, and then a garment sample. Skipping any of those approvals can turn clean vector artwork into cramped lettering, distorted edges, puckering, or a mark that looks correct on test fabric but fails on the actual garment.
Digitizing is production engineering, not file export. A PNG or vector file describes shapes and colors; an embroidery file also controls stitch types, direction, sequence, density, underlay, trims, and other machine instructions. Brother's image-conversion guidance confirms that artwork can be imported and converted in embroidery software, but conversion is only the starting point. A brand still needs evidence that the stitched result preserves the identity of the mark under the conditions of the intended product.
What Must Be Fixed Before a Logo Is Digitized?
The final application must be fixed before digitizing begins. Approve the garment style, fabric, logo dimensions, exact placement, and viewing priority first, because the same artwork needs a different stitch solution on a stable cap panel, a heavy sweatshirt, or a soft T-shirt. If these inputs remain open, every later approval is provisional and a change in size or fabric can force the stitch file to be rebuilt.
Approve the final-size artwork rather than the master logo
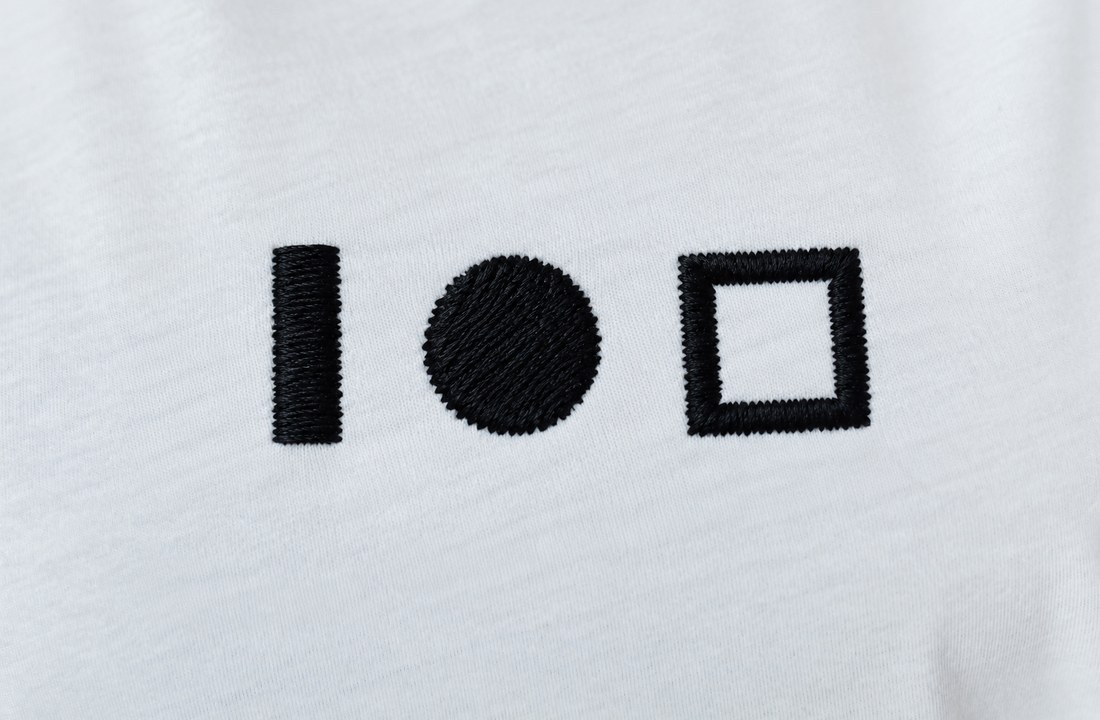
Start with the cleanest available vector artwork, but review a copy at the actual embroidery dimensions. A wide brand mark reduced to a narrow chest position may leave counters in letters too small to remain open. A thin outline that is visible on screen can disappear into surrounding stitches. Fine negative spaces can close after thread spreads or the fabric relaxes. These are not cosmetic surprises after production; they are reasons to simplify before the first sew-out.
Decide which elements carry the identity of the mark. If a tiny registered symbol, tagline, or hairline border cannot survive at the planned size, removing it may be more faithful than forcing it into an unreadable result. Do not let the digitizer make that brand decision silently. Provide a simplified embroidery version and state which proportions, gaps, and letterforms cannot change. Keep the original master artwork separate so the production adaptation is never mistaken for a redesign of the main logo.
Placement also belongs in the input package. Specify the logo width or height, its orientation, and a measurable reference such as distance from a neckline seam or pocket edge. “Left chest” is not a complete instruction because garment size, panel construction, and seam position change the visual center. The approval should also say whether placement remains fixed across sizes or is graded. A large size may need a different reference point even when the logo itself stays the same size.
Keep an artwork decision log beside the brief. Record which details were removed, widened, separated, or redrawn for the embroidery version and who approved each change. This prevents a later stakeholder from restoring an unworkable hairline or tagline because it appears in the master logo. The log also gives future product teams a starting point without implying that the same digitized file is cleared for a new garment.
Match the application to the garment
The fabric and construction tell the digitizer what the stitched mark must resist. A dense fill on a lightweight, flexible knit may pull the surface out of shape. A textured sweatshirt can allow small details to sink. A seam, pocket bag, or multiple fabric layers can disrupt hooping and create an uneven sewing surface. Ask for a clear compatibility judgment before approving a complex mark for any Custom T-Shirts or Custom Sweatshirts program.
Do not approve a stitch file for a generic “cotton fabric.” Record the exact sampled garment or, at minimum, the fabric type, weight, stretch direction, surface texture, and number of layers at the placement. This prevents a successful test on stable woven material from being presented as proof for a flexible knit. It also keeps the brand from treating one approved file as universal across every product category.
How Should Stitch Structure Be Reviewed?
Review stitch structure as a coordinated system, not as isolated density settings. Direction, stitch type, underlay, density, pull compensation, sequence, and pathing determine how the mark sits on the chosen fabric. A change to one variable can affect the others, so the approval should connect each technical choice to a visible requirement in the logo.
Read the stitch plan through visible outcomes
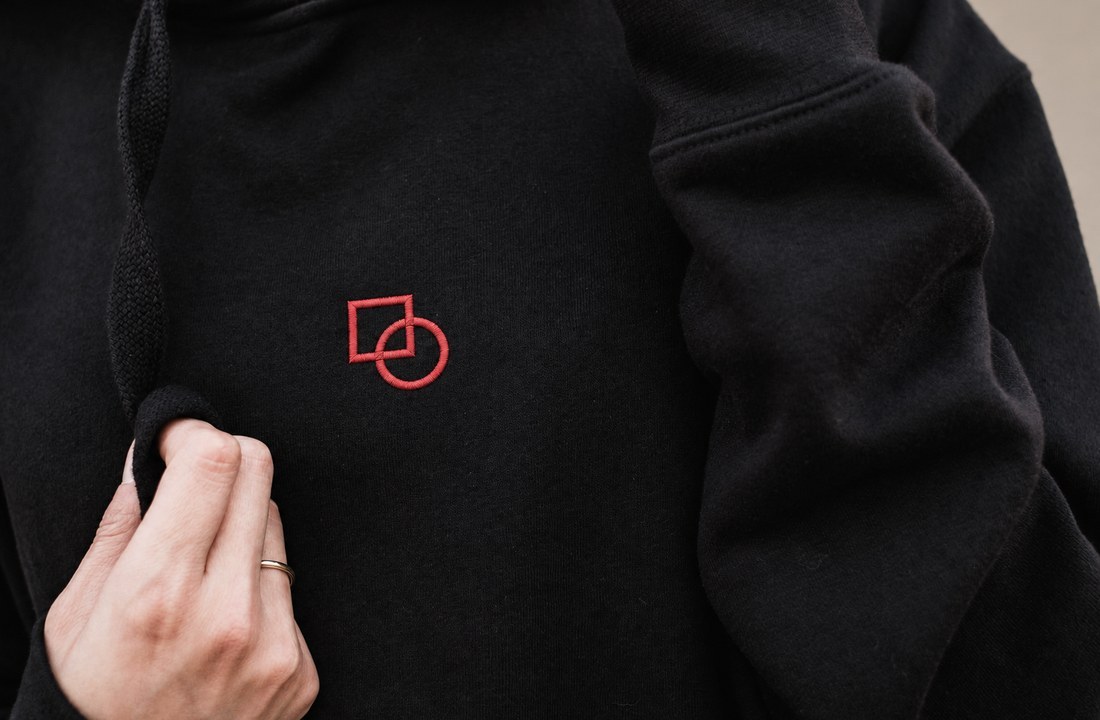
A brand does not need to operate digitizing software to review a stitch plan intelligently. Ask what stitch type is assigned to each major element and why. Satin stitches can create a clean, raised edge on suitable columns, while fill stitches cover broader shapes. Running stitches may suit line details only when the final scale and fabric can hold them. The correct choice depends on shape width, visual priority, and the behavior of the garment, not on a single preferred technique.
Stitch direction should reinforce the shape. Direction changes can separate overlapping objects, make light reflect differently, and keep a filled area from looking like a flat block. Poorly chosen direction can also exaggerate distortion. Sequence matters because later elements may cover connecting stitches or support a clean border, while a bad sequence can create excessive travel, trims, or visible buildup. Ask to see a stitch simulation, but treat it as a planning view rather than proof of the physical result.
Fabric presets can help establish a starting point, yet they are not a substitute for testing. Wilcom's Auto Fabrics documentation explains that a fabric selection can change settings such as pull compensation, spacing, and underlay. That is precisely why the sampled fabric must be identified: changing it after approval changes the technical basis of the file.
Question density and underlay together
More stitches do not automatically create better coverage. Excessive density can make a small logo rigid, increase thread buildup, and pull a soft garment. Too little support can allow fabric color or texture to show through, leave edges unstable, or let stitches sink. Underlay creates a foundation, but its type and extent must fit the top stitching and fabric. It should stabilize the area without becoming an invisible second design that adds unnecessary bulk.
Use a sew-out to check whether edges remain smooth, letter counters stay open, columns retain width, and the surface remains flat after unhooping. If the result puckers, do not accept “add more backing” as the only diagnosis. Review hoop tension, underlay, top-stitch density, pathing, needle and thread choices, and fabric recovery together. The correction should address the cause instead of merely hiding one symptom.
Which Thread and Backing Decisions Need Approval?
Approve physical thread and backing against the sampled garment instead of relying on digital color values. Screen colors cannot predict thread sheen, surrounding fabric influence, or the way two close shades separate under retail lighting. Backing also affects stability, hand feel, edge control, and what remains against the wearer after finishing.
Lock thread by manufacturer reference and sample
Provide target brand colors, then ask the production team to map them to available thread references. A Pantone value can guide the match, but it does not make thread and ink identical materials. Thread finish, twist, and light direction can shift perception. Review the actual thread card or a stitched color sample on the target fabric when color identity is critical. Madeira, for example, publishes physical thread color resources for production matching; a monitor preview should not replace that physical comparison.
Record each approved thread with manufacturer, line, and color reference rather than “red” or a hex code. Also confirm whether the design uses one shade, tonal contrast, or intentional separation between adjacent elements. If two colors look distinct on screen but merge after stitching, adjust the palette or create more visual space before production. The goal is a recognizable mark, not literal adherence to a digital file that the medium cannot reproduce.
The following approval table keeps the discussion tied to evidence rather than software screenshots.
| Approval item | Evidence to review | Reject when | Required action |
|---|---|---|---|
| Final logo size | Artwork printed at size and first sew-out | Small text closes or borders merge | Simplify artwork or enlarge placement |
| Stitch structure | Simulation plus sew-out reverse and front | Excess buildup, gaps, or unstable edges appear | Revise stitch type, direction, sequence, or support |
| Thread color | Physical thread reference on target fabric | Critical colors merge or shift beyond tolerance | Select another reference and restitch affected area |
| Backing | Sew-out with backing identified | Puckering, show-through, stiffness, or poor support remains | Reassess backing and the stitch plan together |
| Placement | Marked garment and worn sample | Logo sits off visual center or crosses construction | Correct placement coordinates before approval |
The table is not a universal specification. It makes the person approving each decision, the physical evidence, and the rejection trigger explicit. Your tolerance can differ by logo and price position, but it should be set before bulk work begins.
Choose backing for the fabric and end use
Backing or stabilizer must support the embroidery during stitching and remain appropriate afterward. Madeira's backing guide distinguishes backing choices by fabric behavior and application; it does not imply that one weight works for every garment. A stable material may need a different solution from a stretchy knit, and a lightweight product may expose stiffness that is acceptable on a heavy sweatshirt.
Ask the sample record to identify backing type and layers. Inspect the inside for trimming quality, sharp edges, excess material, and interference with seams or labels. For garments worn next to skin, hand feel matters alongside appearance. If comfort treatment or covering is proposed, approve it as part of the sample rather than assuming finishing will solve an abrasive result later.
Why Is a Sew-Out Not the Final Garment Approval?
A sew-out proves the stitch file on a stated material under stated conditions; it does not automatically approve the finished garment. The actual product introduces seams, stretch, washing behavior, garment variation, and placement constraints. Use the sew-out to refine the file, then use a decorated garment sample to approve the complete application.

Separate four approvals in the sample path
First approve the artwork adaptation: correct elements, proportions, and final size. Second approve the digitized plan through a simulation and technical discussion. Third approve the sew-out on the intended or closely representative material. Fourth approve the embroidery on the actual garment. Combining these into one yes-or-no message makes it difficult to know what must be repeated when a later change occurs.
Photographs are useful for review records, especially when stakeholders work remotely, but they need context. Include a ruler or size reference, color-controlled lighting when color is critical, the garment style and color, thread references, and both front and reverse views. Request the physical sample when edge quality, stiffness, texture, or skin-side comfort is commercially important. A compressed phone image cannot prove those properties.
If the logo will appear on several products, sample the highest-risk application rather than the easiest. A clean result on a stable sweatshirt does not clear the file for a softer tee. Conversely, a file tuned for a lightweight knit may not create the desired relief on a heavier surface. Related products can share artwork intent, but each fabric-and-placement combination needs its own compatibility decision.
Define change control before approval
Record the digitized file version, logo dimensions, garment SKU, fabric color, thread references, backing, placement, and approval date. A later request to resize the mark is a file change, not a harmless scaling operation. Embroidery objects can fall outside workable proportions when reduced, and density relationships can change when enlarged. Send the revised file through the necessary approval stages again.
This record also prevents an approved image from being separated from its conditions. If a reorder changes garment style or color, compare it with the approved basis. The DTG and embroidery decision guide can help when the mark is too detailed for the proposed scale, but switching decoration methods should be a deliberate product decision rather than an emergency correction after stitching begins.
How Can Brands Approve Embroidery Without Buying Digitizing Alone?
Treat digitizing as one controlled step within a decorated-apparel order. Cloprod's public Custom Apparel page describes embroidery as a specialist decoration method reviewed for the project; it does not establish a standalone digitizing product. Submit artwork, garment, quantity, placement, and deadline together so feasibility and sampling are evaluated against the actual order.
Send one approval-ready brief
The brief should contain editable artwork, a visual reference, final logo dimensions, placement coordinates, garment selection and colors, target thread colors, and any protected details. Identify which small elements may be simplified and which may not. State whether the design needs a flat, tonal result or more visible relief, but leave technical stitch values to the production review and the sew-out evidence.
Add decision ownership. One person should consolidate comments from design, merchandising, and production. Markups such as “make it cleaner” are not actionable; point to the letter, edge, gap, or color that failed and describe the intended outcome. Approve or reject each stage in writing. If the order schedule cannot accommodate a sew-out and garment sample, reduce the design risk or reconsider the launch timing instead of pretending the approval step has no cost.
Before bulk authorization, check the following path:
- Confirm the exact garment and placement.
- Approve a simplified final-size embroidery artwork version.
- Review the digitized plan and version identifier.
- Inspect the sew-out against defined rejection triggers.
- Approve a decorated garment sample under the intended conditions.
- Freeze the file, materials, thread references, and placement for production.
This sequence protects brand identity while leaving room for the medium to work. It also makes revisions traceable: stakeholders know whether a problem belongs to artwork adaptation, digitizing, material support, placement, or garment execution.
Conclusion
The safest way to digitize logo for embroidery production is to approve a chain of physical decisions, not a single file. Fix final size, garment, fabric, and placement before digitizing; review stitch structure and support as one system; then use a sew-out and actual garment sample to prove the result. Keep the approved file attached to its thread, backing, placement, and garment conditions so it is not reused blindly on a different product.
For a project review, send the Cloprod apparel team the editable artwork, garment type, colorways, intended logo dimensions, placement, quantity, target delivery date, and branding requirements. That information allows the team to assess embroidery within the apparel order, identify details that need simplification, and define the appropriate approval path before larger production is authorized.
FAQ
Can a PNG be converted directly into an embroidery file?
Software can convert image data into embroidery objects, but the result still needs editing and a sew-out. Resolution, edge quality, final size, fabric, stitch structure, and sequence all affect whether the converted design is production-ready.
Does a vector logo remove the need for digitizing?
No. Vector artwork gives clean shapes and scale information, but it does not contain machine instructions such as stitch type, direction, density, underlay, or sequence. It is a better input, not a completed embroidery program.
Should the same embroidery file be used on a T-shirt and sweatshirt?
Only after each fabric-and-placement combination has been reviewed. Stretch, thickness, texture, backing needs, and desired relief can differ, so a file proven on one garment is not automatic approval for the other.
What should a brand check in a sew-out sample?
Check dimensions, proportions, readable small text, open negative spaces, edge shape, coverage, puckering, distortion, color separation, stiffness, backing, and the reverse side. Compare the result with written rejection triggers rather than a general impression.
Does changing logo size require a new sample?
Usually, yes. Resizing can change stitch behavior and the viability of small details. The digitized file should be reviewed at the new size, and a new sew-out is the appropriate evidence when the change affects structure or appearance.