
%20-%20https://sketch.com%20--%3e%3ctitle%3eT-shirts备份%202%3c/title%3e%3cdesc%3eCreated%20with%20Sketch.%3c/desc%3e%3cg%20id='T-shirts备份-2'%20stroke='none'%20stroke-width='1'%20fill='none'%20fill-rule='evenodd'%20transform='translate(0.000000,%201.000000)'%3e%3cg%20id='编组'%20transform='translate(1.000000,%2010.607599)'%20stroke='%23333333'%20stroke-width='2'%3e%3cpath%20d='M24.7506037,2.40561696%20L24.4109858,2.94791681%20C23.1539677,5.92351386%2021.831857,6.92184787%2018.472318,6.92184787%20C15.0918065,6.92184787%2013.7880665,5.90817694%2012.5599904,2.88704991%20C12.3847844,2.4561805%2012.0176189,2.13892356%2011.5768399,2.03613378%20C11.1481647,1.93340907%2010.6944147,2.05271913%2010.3590373,2.35903823%20L2.14473535,9.86550133%20C0.720776712,11.1696549%200.606481197,13.4202167%201.87710556,14.8789444%20L2.07276829,15.0840278%20C2.25830914,15.270309%202.47988147,15.4396542%202.72897579,15.5864188%20L7.32818819,18.2773511%20L7.28090871,18.9005194%20L6.25354816,32.4414343%20C6.21073375,32.9642561%206.44784527,33.473791%206.86639235,33.7641227%20C10.1405412,36.0536646%2013.3721888,37%2018.5296327,37%20C23.6951097,37%2026.9045107,36.0489513%2030.1280064,33.7695522%20L30.283246,33.6433265%20C30.6132328,33.3345129%2030.7846536,32.871259%2030.7355391,32.4039313%20L29.3432358,18.2472635%20L29.9205868,17.9293432%20L34.180155,15.5837978%20C35.172928,15.0358955%2035.8462157,14.0242248%2035.9766588,12.8762784%20C36.1078384,11.7218503%2035.6805042,10.5744842%2034.8363688,9.80961913%20L26.6326031,2.35780292%20C26.2994807,2.05668927%2025.8445706,1.93608725%2025.4144091,2.03482553%20C25.1685409,2.08962871%2024.9357839,2.22011465%2024.7506037,2.40561696%20Z'%20id='路径'%20fill-rule='nonzero'%3e%3c/path%3e%3cpath%20d='M32.0227213,7.12706337%20C34.1435585,6.79908718%2035.5589604,6.0103637%2036.2689268,4.76089296%20C36.7450972,3.92288014%2037.1241904,3.15623869%2037.4062064,2.46096862%20C37.6137918,1.94917626%2038.1969662,1.70257588%2038.7087556,1.91016839%20C38.8174691,1.95426485%2038.9175753,2.01714687%2039.0044951,2.09593814%20L47.0583283,9.39659336%20L47.7193116,10.1076368%20C49.0578159,11.5475138%2048.9756371,13.7998368%2047.5357601,15.1383411%20C47.3875203,15.2761442%2047.2277976,15.4010531%2047.0583283,15.5117097%20L41.9602936,18.3560999%20L43.2627471,32.7848946%20C43.2911962,33.0999871%2043.168856,33.4099546%2042.932878,33.6206843%20C42.6875325,33.8397791%2042.4886172,34.0097554%2042.3361319,34.1306133%20C39.7263264,36.1991123%2036.3979867,37.2333618%2032.3511128,37.2333618%20C28.7945467,37.2333618%2026.1316404,36.9623653%2024.3623939,36.4203724'%20id='路径-2'%20stroke-linecap='round'%3e%3c/path%3e%3c/g%3e%3cpath%20d='M33.4666494,4%20C32.7228105,4%2032.5,6.59294054%2031.8988718,7.11217576%20C31.2977436,7.63141098%2029.4332988,7.40648891%2029.4332988,8.12452017%20C29.4332988,8.84255143%2031.2477079,9.14206726%2031.8988718,9.8748333%20C32.5500357,10.6075994%2032.7509178,13.450957%2033.4666494,13.450957%20C34.182381,13.450957%2034.3969063,10.4640601%2034.8062404,9.8748333%20C35.2155745,9.28560653%2037.2689268,8.78824215%2037.2689268,8.12452017%20C37.2689268,7.46079818%2035.2474011,7.64545819%2034.8062404,7.11217576%20C34.3650797,6.57889333%2034.2104883,4%2033.4666494,4%20Z'%20id='路径-14'%20fill='%23333333'%3e%3c/path%3e%3c/g%3e%3c/svg%3e)
'%20stroke-linejoin='round'%3e%3cg%20id='编组'%20transform='translate(9.000000,%207.000000)'%20fill-rule='nonzero'%20stroke='%23333333'%20stroke-width='2'%3e%3cpath%20d='M31.6580999,-0.102439008%20C30.5100269,2.18823585%2030.0542426,5.67474993%2030.3587763,9.42418424%20C30.6822663,13.3951973%2031.8077846,17.2494259%2033.4717621,19.9872374%20L33.4717621,19.9872374%20L33.4717621,40.5126294%20L-1,40.5126294%20L-1,19.9934791%20C0.658093371,17.2553578%201.78946921,13.4009517%202.11296635,9.42985083%20C2.41752353,5.68012736%201.96173463,2.19367658%200.813663539,-0.0970116329%20L0.813663539,-0.0970116329%20L8.12511393,-0.0970116329%20C7.93029031,2.82458939%208.80601437,5.51057742%2010.5050219,7.35259165%20C11.911224,8.87715484%2013.8817335,9.80794816%2016.2358811,9.80794816%20C18.5896257,9.80794816%2020.5597831,8.8761884%2021.9658812,7.35090274%20C23.6654197,5.50730309%2024.5415191,2.81937778%2024.3466448,-0.102439008%20L24.3466448,-0.102439008%20Z'%20id='路径'%3e%3c/path%3e%3cline%20x1='0'%20y1='35.5434153'%20x2='33.3493773'%20y2='35.5434153'%20id='路径-5'%3e%3c/line%3e%3cpath%20d='M7.02092154,-7.10542736e-15%20C10.1319066,2.93766424%2013.2035597,4.40649636%2016.2358811,4.40649636%20C19.2682024,4.40649636%2022.2974375,2.93766424%2025.3235864,-7.10542736e-15'%20id='路径-7'%20stroke-linecap='round'%3e%3c/path%3e%3cpath%20d='M31.4953977,2.63284558%20L36.4771799,2.61608223%20C35.6927912,8.39179041%2036.7632888,14.5260803%2039.6886728,21.018952%20L39.6886728,39.4218217%20L34.3249871,39.4218217'%20id='路径-9'%20stroke-linecap='round'%3e%3c/path%3e%3c/g%3e%3c/g%3e%3c/svg%3e)
'%3e%3cpath%20d='M19.7354789,3.20880828%20C19.7605297,5.17861174%2020.6448662,6.94071017%2022.0295594,8.13965347%20C23.1932709,9.14725872%2024.711067,9.75671011%2026.3711606,9.75671011%20C28.0312542,9.75671011%2029.5490503,9.14725872%2030.7127618,8.13965347%20C31.8921595,7.11846622%2032.7085685,5.68873246%2032.9402054,4.07008582%20C32.9791132,3.79820377%2033.0006898,3.52681041%2033.0059749,3.25726284%20C33.3088406,3.22718757%2033.6170537,3.21177646%2033.9300294,3.21174794%20C36.1624168,3.21154457%2038.1526409,3.99399935%2039.6884369,5.29843532%20C41.2675336,6.63964892%2042.3676941,8.53665197%2042.7454691,10.7166588%20L42.7454691,10.7166588%20L46.1709196,41.7693318%20C46.247944,42.3321697%2046.0859691,42.8829051%2045.7084154,43.3183964%20C45.3612167,43.722187%2044.8663578,43.9753491%2044.3260734,44.0229386%20L44.3260734,44.0229386%20L39.8040277,44.0310553%20C39.3781173,44.0310553%2038.9829429,43.8965525%2038.6635982,43.6700095%20C38.3024986,43.4138456%2038.038002,43.0403296%2037.9249985,42.6039024%20L37.9249985,42.6039024%20L37.6832738,41.0277321%20C37.0157385,42.0213966%2035.9570908,42.6391292%2034.7706802,42.7062063%20L34.7706802,42.7062063%20L16.8781526,42.7122292%20C15.6665116,42.7122292%2014.5474319,42.1274244%2013.8744406,41.1564779%20L13.8744406,41.1564779%20L13.5787457,42.5263987%20C13.4931715,42.9254624%2013.2806044,43.2768413%2012.9822705,43.540301%20C12.6774394,43.8094984%2012.2828471,43.9856112%2011.8527165,44.0228058%20L11.8527165,44.0228058%20L7.2966742,44.0301767%20C6.68507413,44.0301767%206.11615304,43.7675926%205.72859965,43.3188465%20C5.38697876,42.9229494%205.22291954,42.434758%205.24956026,41.9304278%20L5.24956026,41.9304278%20L9.114459,10.9787644%20C9.43354023,8.78714507%2010.4574643,6.866184%2011.9617204,5.48365114%20C13.439357,4.12558378%2015.381771,3.28220853%2017.5931807,3.21561749%20L17.5931807,3.21561749%20Z'%20id='形状结合'%20stroke='%23333333'%20stroke-width='2'%20stroke-linejoin='round'%20fill-rule='nonzero'%3e%3c/path%3e%3cline%20x1='14.9471931'%20y1='16.0295055'%20x2='13.8670819'%20y2='43.1333598'%20id='路径-2'%20stroke='%23333333'%20stroke-width='2'%20stroke-linejoin='round'%20fill-rule='nonzero'%3e%3c/line%3e%3cline%20x1='37.6587671'%20y1='16.0295055'%20x2='36.567858'%20y2='43.1333598'%20id='路径-2备份'%20stroke='%23333333'%20stroke-width='2'%20stroke-linejoin='round'%20fill-rule='nonzero'%20transform='translate(37.113313,%2029.581433)%20scale(-1,%201)%20translate(-37.113313,%20-29.581433)%20'%3e%3c/line%3e%3cpath%20d='M4.14236007,0%20C3.37841745,0%203.14958501,2.66302001%202.53221008,3.19628862%20C1.91483515,3.72955722%200,3.49855617%200,4.23599369%20C0,4.9734312%201.86344714,5.28104205%202.53221008,6.03361258%20C3.20097302,6.78618312%203.4072844,9.70638822%204.14236007,9.70638822%20C4.87743575,9.70638822%205.09775907,6.6387644%205.51815625,6.03361258%20C5.93855342,5.42846076%208.04740171,4.9176541%208.04740171,4.23599369%20C8.04740171,3.55433327%205.97124022,3.74398409%205.51815625,3.19628862%20C5.06507227,2.64859315%204.9063027,0%204.14236007,0%20Z'%20id='路径-14'%20fill='%23333333'%3e%3c/path%3e%3cline%20x1='6.44444444'%20y1='38.3089431'%20x2='13.2552553'%20y2='38.3089431'%20id='路径-3'%20stroke='%23333333'%20stroke-width='2'%20stroke-linejoin='round'%20fill-rule='nonzero'%3e%3c/line%3e%3cline%20x1='38'%20y1='38.3089431'%20x2='45.8108108'%20y2='38.3089431'%20id='路径-3备份'%20stroke='%23333333'%20stroke-width='2'%20stroke-linejoin='round'%20fill-rule='nonzero'%3e%3c/line%3e%3c/g%3e%3c/g%3e%3c/svg%3e)
'%3e%3cpath%20d='M34.9261439,0%20C34.1622012,0%2033.9333688,2.66302001%2033.3159939,3.19628862%20C32.6986189,3.72955722%2030.7837838,3.49855617%2030.7837838,4.23599369%20C30.7837838,4.9734312%2032.6472309,5.28104205%2033.3159939,6.03361258%20C33.9847568,6.78618312%2034.1910682,9.70638822%2034.9261439,9.70638822%20C35.6612195,9.70638822%2035.8815429,6.6387644%2036.30194,6.03361258%20C36.7223372,5.42846076%2038.8311855,4.9176541%2038.8311855,4.23599369%20C38.8311855,3.55433327%2036.755024,3.74398409%2036.30194,3.19628862%20C35.8488561,2.64859315%2035.6900865,0%2034.9261439,0%20Z'%20id='路径-14'%20fill='%23333333'%3e%3c/path%3e%3cpath%20d='M18.4864865,7.18963854%20C15.4758095,7.17353458%2011.6765338,8.43151301%209.29444611,11.1321905%20C6.91235846,13.832868%201.25126095,20.2672047%200.387510052,31.5103084%20C-0.188323879,39.0057108%20-0.122397588,42.4815693%200.585288924,41.9378837%20L5.35517862,43.1351351%20C6.49874742,42.6940382%207.11008428,41.3246688%207.18918919,39.027027%20C10.964873,40.352122%2014.7306388,40.9373335%2018.4864865,40.7826614%20C22.2423342,40.6279893%2026.0080999,40.0943847%2029.7837838,39.1818475%20C30.1353835,41.4550539%2030.9437088,42.7728164%2032.2087597,43.1351351%20L35.97522,42.1868999%20C37.082045,41.6368999%2037.2680046,38.0780361%2036.5330988,31.5103084%20C35.4307401,21.6587169%2030.3374081,13.8085547%2027.6629466,11.1321905%20C24.9884851,8.45582629%2021.4971635,7.2057425%2018.4864865,7.18963854%20Z'%20id='路径-2'%20stroke='%23333333'%20stroke-width='2'%20stroke-linejoin='round'%20fill-rule='nonzero'%3e%3c/path%3e%3cpath%20d='M30.4824021,39.027027%20C29.7361521,36.2882883%2029.7873366,33.5495495%2030.6359556,30.8108108'%20id='路径-4'%20stroke='%23333333'%20stroke-width='2'%20stroke-linecap='round'%20stroke-linejoin='round'%20fill-rule='nonzero'%20transform='translate(30.297297,%2034.918919)%20scale(-1,%201)%20translate(-30.297297,%20-34.918919)%20'%3e%3c/path%3e%3cpath%20d='M18.5081607,1.02702703%20C23.5904804,1.02702703%2028.8837764,7.80750772%2027.5089127,10.5572351%20C26.1340491,13.3069625%2011.044553,13.6315238%209.50740862,10.5572351%20C7.97026429,7.48294643%2013.4258409,1.02702703%2018.5081607,1.02702703%20Z'%20id='矩形'%20stroke='%23333333'%20stroke-width='2'%20stroke-linejoin='round'%20fill-rule='nonzero'%3e%3c/path%3e%3cpath%20d='M14.2487482,28.9937363%20C14.9334329,27.7204903%2015.1527269,26.6144701%2014.9066303,25.6756757%20L22.1744145,25.6756757%20C22.1611041,26.952086%2022.3983129,28.0581062%2022.8860409,28.9937363%20C23.3737689,29.9293664%2024.1722123,30.8774003%2025.2813711,31.8378378%20L24.6486486,35.9459459%20C22.5945946,36.4426461%2020.5405405,36.6909962%2018.4864865,36.6909962%20C16.4324324,36.6909962%2014.3783784,36.4426461%2012.3243243,35.9459459%20L11.6895463,31.8378378%20C12.7109962,31.2150162%2013.5640635,30.2669823%2014.2487482,28.9937363%20Z'%20id='矩形'%20stroke='%23333333'%20stroke-width='2'%20stroke-linecap='round'%20stroke-linejoin='round'%20fill-rule='nonzero'%3e%3c/path%3e%3cpath%20d='M6.8607805,39.027027%20C6.11453049,36.2882883%206.16571499,33.5495495%207.014334,30.8108108'%20id='路径-4'%20stroke='%23333333'%20stroke-width='2'%20stroke-linecap='round'%20stroke-linejoin='round'%20fill-rule='nonzero'%3e%3c/path%3e%3c/g%3e%3c/g%3e%3c/svg%3e)
'%20fill-rule='nonzero'%20stroke='%23333333'%20stroke-width='2'%3e%3cpath%20d='M30.2050905,-0.0716765239%20C30.6708724,-0.020568619%2031.0989537,0.0686601335%2031.483746,0.196177499%20C33.6750695,0.92236607%2036.250887,3.48295379%2038.4018553,7.23671243%20C40.2937276,10.5383101%2041.8772238,14.7414509%2042.6174967,19.2400665%20C43.3015193,23.3968505%2043.7565804,28.9686602%2043.9784178,35.9547829%20C44.0400516,36.4969187%2043.8781366,37.0250522%2043.5140054,37.4450611%20C43.2062203,37.8030139%2042.7813981,38.041594%2042.3119771,38.1218049%20L42.3119771,38.1218049%20L37.9607078,39.444336%20C37.4726975,39.4862166%2037.0161903,39.348771%2036.6566164,39.0936894%20C36.3026307,38.8425722%2036.0422434,38.4777692%2035.9279386,38.0514231%20L35.9279386,38.0514231%20L35.6512065,36.5336709%20C35.0300844,37.3677575%2030.555744,39.4518537%2024.4058776,39.4509091%20C18.2992611,39.4499711%2014.4288377,37.4473381%2013.778979,36.6481801%20L13.778979,36.6481801%20L13.4946346,37.9590944%20C13.409733,38.3550217%2013.1988587,38.7036554%2012.9028653,38.9650483%20C12.5531444,39.2738881%2012.0843057,39.4592101%2011.5795724,39.4506141%20L11.5795724,39.4506141%20L6.83733744,37.7838851%20C6.30688108,37.734067%205.8219314,37.4841832%205.47966262,37.0878719%20C5.10475105,36.6533949%204.94361938,36.1075601%205.01987087,35.5487108%20C5.87952927,27.1575901%206.62275357,21.5194236%207.24381867,18.6331488%20C8.15689051,14.3898316%2010.0567274,9.62710944%2012.2478489,6.01913378%20C14.4198269,2.44268049%2016.9155321,0.126020223%2019.0038476,-0.0341941814%20C19.3349904,-0.059599273%2019.684528,-0.0329792934%2020.048933,0.0426727475%20C20.0485026,0.322038007%2020.0587709,0.606972386%2020.0781127,0.89613626%20C20.1906468,2.57854425%2020.5885245,4.07814763%2021.5538567,5.09082243%20C22.3562527,5.93257014%2023.5496125,6.39100896%2025.2079599,6.39100896%20C26.8232274,6.39100896%2027.9750703,5.95750793%2028.7455387,5.15028431%20C29.680592,4.17062417%2030.0530617,2.7130328%2030.1717874,1.07319992%20C30.200092,0.68225832%2030.2126331,0.299489175%2030.2050905,-0.0716765239%20Z'%20id='形状结合'%3e%3c/path%3e%3cpath%20d='M19.5133106,0%20C21.3811567,1.7116825%2022.6015035,2.13363743%2025.1288966,2.13363743%20C27.6562896,2.13363743%2028.7112206,1.7116825%2031.0265736,0'%20id='路径-7'%20stroke-linecap='round'%3e%3c/path%3e%3cpath%20d='M14.2776845,37.1340996%20C13.4265244,34.2247524%2013.6221502,31.1532826%2014.63166,28.1550842'%20id='路径-4'%20stroke-linecap='round'%3e%3c/path%3e%3cpath%20d='M35.6114473,37.1340996%20C34.7602872,34.2247524%2034.955913,31.1532826%2035.9654228,28.1550842'%20id='路径-4备份'%20stroke-linecap='round'%20transform='translate(35.520490,%2032.644592)%20scale(-1,%201)%20translate(-35.520490,%20-32.644592)%20'%3e%3c/path%3e%3cpath%20d='M15.6089327,1.73235424%20C14.8279907,1.73235424%2013.5856023,1.15490283%2011.8817673,-5.68434189e-14%20C5.88636871,6.20145775%202.28312945,13.1925875%201.07204948,20.9733893%20C-0.139030491,28.754191%20-0.190632326,32.961664%200.917243972,33.5958082%20L4.99556447,35.210175'%20id='路径-2'%20stroke-linecap='round'%3e%3c/path%3e%3c/g%3e%3cpath%20d='M25.5592019,34.3180607%20C26.2438866,33.0448147%2026.4631806,31.9387944%2026.217084,31%20L33.4848682,31%20C33.4715578,32.2764103%2033.7087666,33.3824305%2034.1964946,34.3180607%20C34.6842225,35.2536908%2035.4826659,36.2017246%2036.5918248,37.1621622%20L35.9591023,41.2702703%20C33.9050483,41.7669705%2031.8509942,42.0153206%2029.7969402,42.0153206%20C27.7428861,42.0153206%2025.6888321,41.7669705%2023.634778,41.2702703%20L23,37.1621622%20C24.0214499,36.5393405%2024.8745172,35.5913066%2025.5592019,34.3180607%20Z'%20id='矩形'%20stroke='%23333333'%20stroke-width='2'%20stroke-linecap='round'%20fill-rule='nonzero'%3e%3c/path%3e%3c/g%3e%3c/svg%3e)
'%20fill-rule='nonzero'%20stroke='%23333333'%20stroke-linejoin='round'%20stroke-width='2'%3e%3cpath%20d='M23.9621848,47.8189278%20C23.5302392,47.8189278%2023.1846827,47.5165659%2023.0982935,47.0846203%20L19.2107828,24.2778909%20L15.3232721,47.0846203%20C15.236883,47.5165659%2014.8913265,47.8189278%2014.4593809,47.8189278%20L1.26379866,47.8189278%20C1.00463128,47.8189278%200.788658489,47.7325387%200.615880175,47.5165659%20C0.44310192,47.3437877%200.356712793,47.0846203%200.399907386,46.8254529%20C1.6957443,32.7872199%204.15783439,5.79061781%204.15783439,4.23561352%20L4.15783439,3.5445005%20L4.15783439,1.29838325%20C4.15783439,0.823243081%204.54658544,0.434491979%205.02172561,0.434491979%20L33.8629155,0.434491979%20C34.3380556,0.434491979%2034.7268067,0.823243022%2034.7268067,1.29838325%20L34.7268067,4.14922439%20C35.4611143,9.4189611%2038.35515,45.3136432%2038.4847338,46.8254529%20C38.4847338,47.0846203%2038.4415392,47.3005931%2038.2687609,47.5165659%20C38.0959826,47.6893442%2037.8800099,47.8189278%2037.6208425,47.8189278%20L23.9621848,47.8189278%20Z'%20id='路径'%3e%3c/path%3e%3cpath%20d='M12.2091913,7.64705882%20C13.2588301,14.6696078%2010.1386094,18.1808824%202.84852941,18.1808824'%20id='路径-8'%3e%3c/path%3e%3cpath%20d='M36.6606619,7.64705882%20C37.7103006,14.6696078%2034.59008,18.1808824%2027.3,18.1808824'%20id='路径-8备份'%20transform='translate(32.079412,%2012.913971)%20scale(-1,%201)%20translate(-32.079412,%20-12.913971)%20'%3e%3c/path%3e%3cline%20x1='4.36015661'%20y1='6.85020053'%20x2='35.4250589'%20y2='6.85020053'%20id='路径-7'%3e%3c/line%3e%3cline%20x1='22.9411765'%20y1='43.0147059'%20x2='38.2352941'%20y2='43.0147059'%20id='路径-3备份'%3e%3c/line%3e%3cline%20x1='0.955882353'%20y1='43.0147059'%20x2='16.25'%20y2='43.0147059'%20id='路径-3备份-2'%3e%3c/line%3e%3c/g%3e%3cpath%20d='M6.14236007,5%20C5.37841745,5%205.14958501,7.66302001%204.53221008,8.19628862%20C3.91483515,8.72955722%202,8.49855617%202,9.23599369%20C2,9.9734312%203.86344714,10.281042%204.53221008,11.0336126%20C5.20097302,11.7861831%205.4072844,14.7063882%206.14236007,14.7063882%20C6.87743575,14.7063882%207.09775907,11.6387644%207.51815625,11.0336126%20C7.93855342,10.4284608%2010.0474017,9.9176541%2010.0474017,9.23599369%20C10.0474017,8.55433327%207.97124022,8.74398409%207.51815625,8.19628862%20C7.06507227,7.64859315%206.9063027,5%206.14236007,5%20Z'%20id='路径-14'%20fill='%23333333'%3e%3c/path%3e%3c/g%3e%3c/svg%3e)
'%20fill-rule='nonzero'%20stroke='%23333333'%20stroke-width='2'%3e%3cpath%20d='M33.0403779,3.78231646%20C33.3707049,3.78231646%2033.6611649,4.12340341%2033.7295084,4.6094523%20C33.9402343,6.02496304%2034.1224837,11.3518882%2034.3104284,12.7759262%20L34.3104284,12.7759262%20L34.2695566,12.7765763%20C35.9295803,22.1661353%2036.8219297,30.5371284%2036.5177248,40.2716845%20L36.5177248,40.2716845%20L36.4949436,41.0291585%20L20.6164655,41.0291585%20L18.3311855,27.8254864%20C18.2913184,27.546417%2017.8926479,27.546417%2017.8527808,27.8254864%20L17.8527808,27.8254864%20L16.0602308,41.0291585%20L0.181752703,41.0291585%20L0.158971523,40.2716845%20C-0.146886806,30.6582401%200.297947405,22.3663342%201.86201358,13.1114332%20L1.91967082,12.7759262%20C2.10761547,11.3518882%202.28986491,6.02496304%202.50059073,4.6094523%20C2.57462954,4.12340341%202.85939423,3.78231646%203.18972123,3.78231646%20L3.18972123,3.78231646%20Z'%20id='形状结合'%3e%3c/path%3e%3cpath%20d='M9.07993884,12.1521737%20C10.0037613,17.7608692%207.25754983,20.5652169%200.841304326,20.5652169'%20id='路径-8'%3e%3c/path%3e%3cpath%20d='M35.1603729,12.1521737%20C36.0841954,17.7608692%2033.3379839,20.5652169%2026.9217384,20.5652169'%20id='路径-8备份'%20transform='translate(31.128260,%2016.358695)%20scale(-1,%201)%20translate(-31.128260,%20-16.358695)%20'%3e%3c/path%3e%3cline%20x1='17.9014823'%20y1='11.588091'%20x2='17.9014823'%20y2='19.9970733'%20id='路径-2'%20stroke-linecap='round'%3e%3c/line%3e%3cline%20x1='2.3484169'%20y1='11.588091'%20x2='34.3104284'%20y2='11.588091'%20id='路径-7'%3e%3c/line%3e%3cline%20x1='33.8721372'%20y1='9.34782609'%20x2='39.4402724'%20y2='9.34782609'%20id='路径-7备份'%3e%3c/line%3e%3cpath%20d='M37.5114243,38.2801333%20L42.0652174,38.2801333%20C42.8222165,31.1294628%2042.0652174,19.9970733%2039.7482269,10.8705978%20L38.8648884,0.904789217%20C38.8243442,0.420447683%2038.4193994,0.0479844782%2037.9333638,0.0479844782%20L9.67260658,0.0479844782%20C9.1563404,0.0479844782%208.73782397,0.466500908%208.73782397,0.982767087%20L8.73782397,3.73913043'%20id='路径-10'%3e%3c/path%3e%3c/g%3e%3c/g%3e%3c/svg%3e)


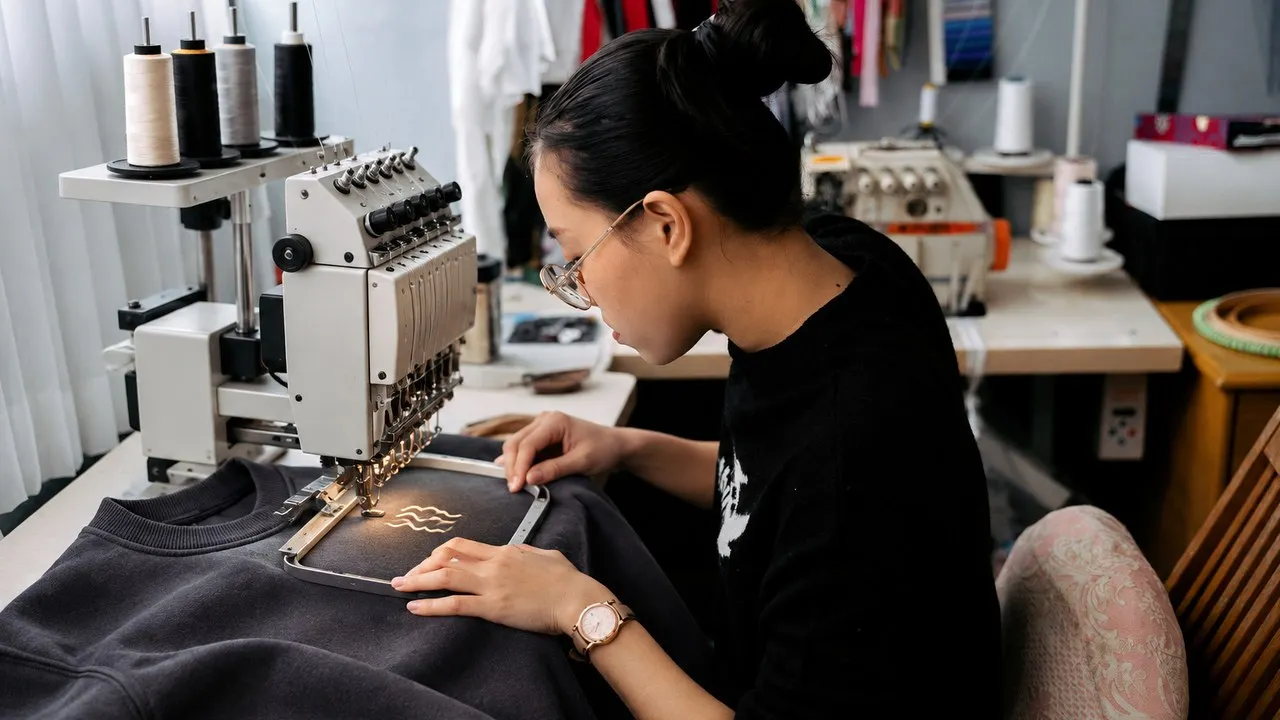
A custom embroidered sweatshirt succeeds only when the garment, digitized logo and machine setup are developed together. A clean vector file and a substantial crewneck do not guarantee clean stitching. Fabric stretch, fleece structure, surface texture, logo size, stitch direction, density, backing, hooping and placement all change how the finished mark sits on the garment.
For buyers, the correct decision is project-level approval. Choose the exact sweatshirt style and color, define the physical logo size and placement, let the embroidery team digitize for that substrate, and approve a stitched sample that includes the reverse side and care test. The Custom Sweatshirts catalog can provide garment candidates, while the finished sample proves whether one garment and one artwork can work together. Do not extend that approval to another fleece, logo scale or placement without checking the changed combination.
Which Sweatshirt Fabric Gives Embroidery Enough Stability?
Choose a sweatshirt fabric with enough surface stability for the intended stitch load while retaining the hand, stretch and comfort the product promises; weight alone cannot decide this. Buyers should evaluate knit structure, face texture, fleece or loopback interior, recovery and panel construction on the exact SKU.
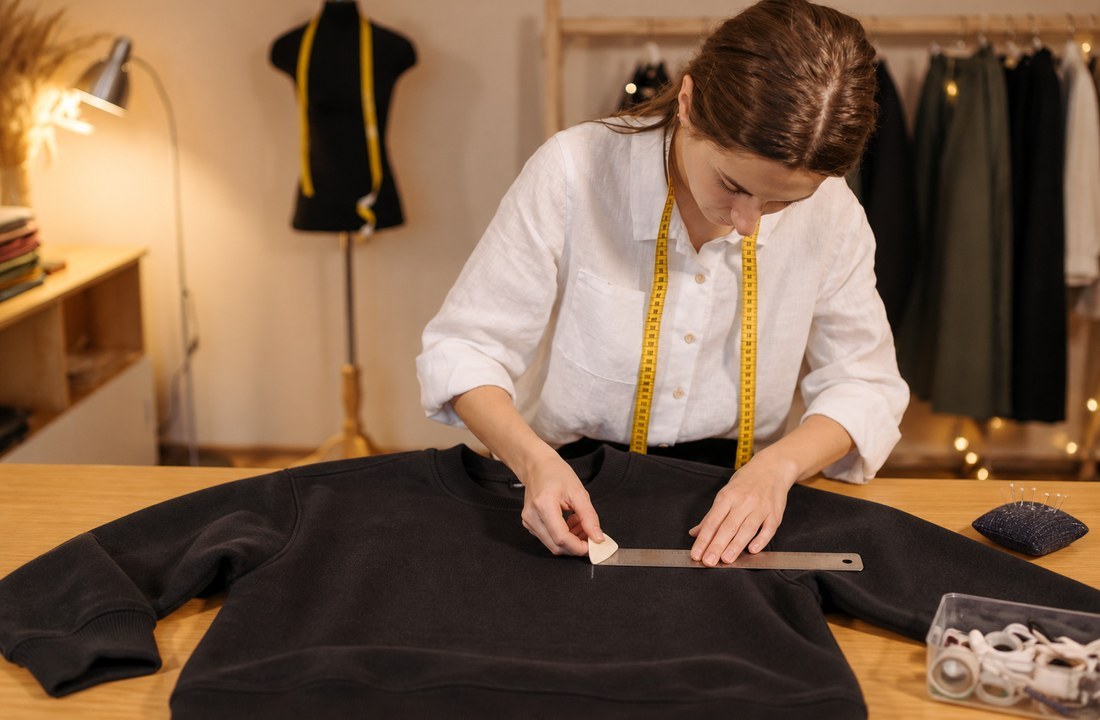
Compare the face and the interior
Examine the outer face where the needle enters. A smooth, compact surface generally gives small edges and lettering a clearer base than an open, uneven or highly textured face. Stretch in either direction can allow the panel to move during stitching. Brushed fleece, French terry and other sweatshirt constructions also behave differently at the reverse side, where backing and thread contact the wearer.
Do not infer embroidery performance from GSM alone. Fabric weight can contribute body, but two fabrics with a similar listed weight may use different yarns, knit structures and finishes. CottonWorks explains that fabric construction and quality performance depend on how fibers, yarns and construction parameters combine. That general principle supports inspection, not a fixed embroidery threshold.
Check the intended area for seams, ribs, pockets, plackets or multiple layers. A left-chest logo on a flat body panel presents different constraints from a cuff mark, neckline detail or design close to a seam. If the placement forces uneven hooping or thickness, move the artwork or choose another application rather than expecting digitizing to compensate for every physical obstacle.
Treat the exact SKU as the substrate
The listed 345 GSM relaxed-fit fleece-lined sweatshirt is one specific garment candidate. Its weight, fit and construction should be verified on the current product page and physical sample. Its existence does not prove that every logo size, thread, backing or placement has already been tested on it.
Measure the panel on representative sizes. A logo that looks balanced on an extra-large sweatshirt may crowd the neckline or armhole on a smaller size. Decide whether the mark uses one physical dimension across the run or changes by size group. One size is simpler to control; size grouping can improve proportion but introduces additional files and approvals.
Stretch the sample panel lightly and release it. Observe recovery, surface distortion and how the garment hangs. This light stretch indicates where the design may pull the knit out of shape; it is not a laboratory test. If the product promise depends on a soft drape, a large dense fill may conflict with the garment even when the stitches are technically secure.
How Should a Logo Be Simplified for Sweatshirt Embroidery?
A logo should be simplified when its smallest details cannot be translated reliably at the approved physical size. The buyer should protect the recognizable structure of the mark while allowing line thickness, gaps, lettering and fills to be adjusted for thread rather than pixels.
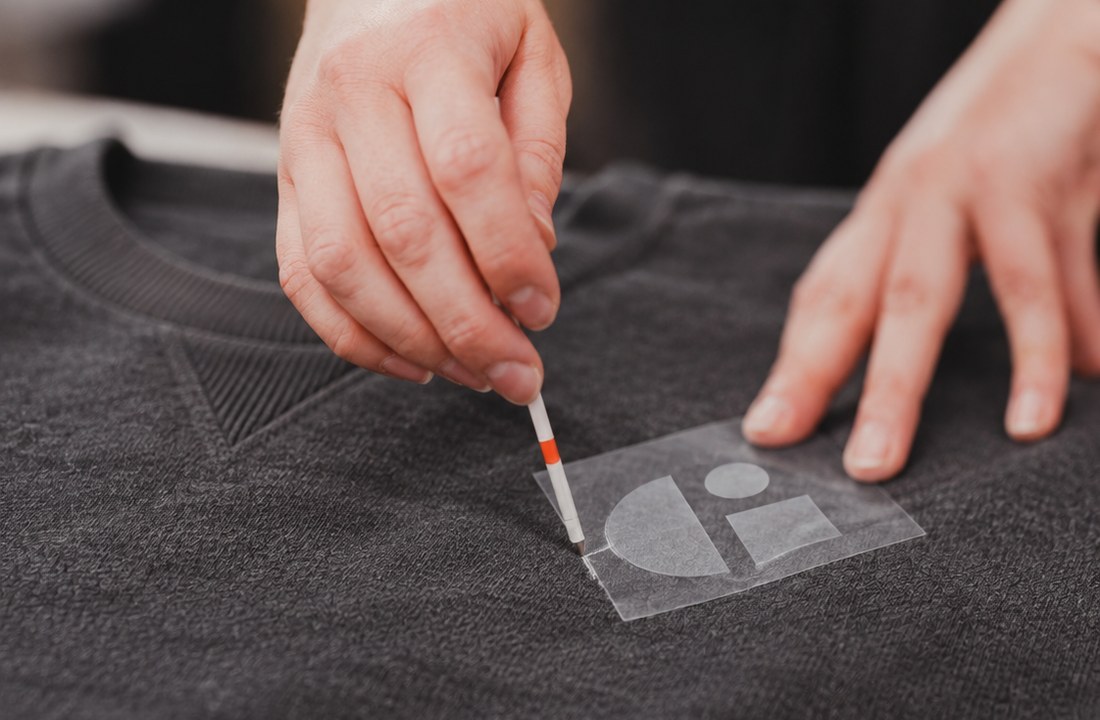
Separate brand identity from screen detail
Begin with the original vector artwork and identify the elements that must remain: wordmark shape, icon silhouette, color relationship and spacing. Then review tiny counters, hairline strokes, distressed texture, gradients and closely spaced outlines. Thread has physical width and direction, so details that remain distinct on a monitor can merge or disappear when stitched.
Ask for an embroidery proof that shows the proposed simplification and final physical dimensions. A visual proof is useful for checking spelling, orientation and broad shape, but it does not replace the sew-out. The material, backing, thread and machine settings are not represented fully on screen.
Avoid enlarging or shrinking a digitized file without review. Brother's guidance on changing embroidery size and density advises users to perform trial embroidery with the same fabric and threads. The transferable buying lesson is that a new size is a new test condition. Request a fresh sew-out when physical scale changes enough to alter stitch spacing or small details.
Give every logo version an explicit job
Create an embroidery-specific master rather than asking the production team to improvise from a web logo. It can retain the brand's identity while removing effects that do not translate. Name the file by placement and finished size, such as left-chest small or center-chest medium, without embedding an unverified stitch count in the name.
If the same collection uses a full graphic print and a small embroidered mark, treat them as different production assets. Do not force the large print artwork into thread merely for consistency. Embroidery is often effective for compact marks, but broad solid areas can add stiffness and weight. A patch, appliqué, print or mixed method may be more appropriate when the design depends on a large continuous image.
The embroidery versus printing guide can help compare methods at a higher level. For this sweatshirt decision, the deciding evidence remains the stitched logo on the intended garment, not a general statement that one method is more premium.
What Do Density, Backing and Thread Color Change?
Density, backing and thread color change structure as well as appearance. Too much thread can stiffen or distort a knit panel; insufficient support can allow shifting or puckering; and a digital color value may not have an exact thread equivalent. These variables must be specified and sampled together.
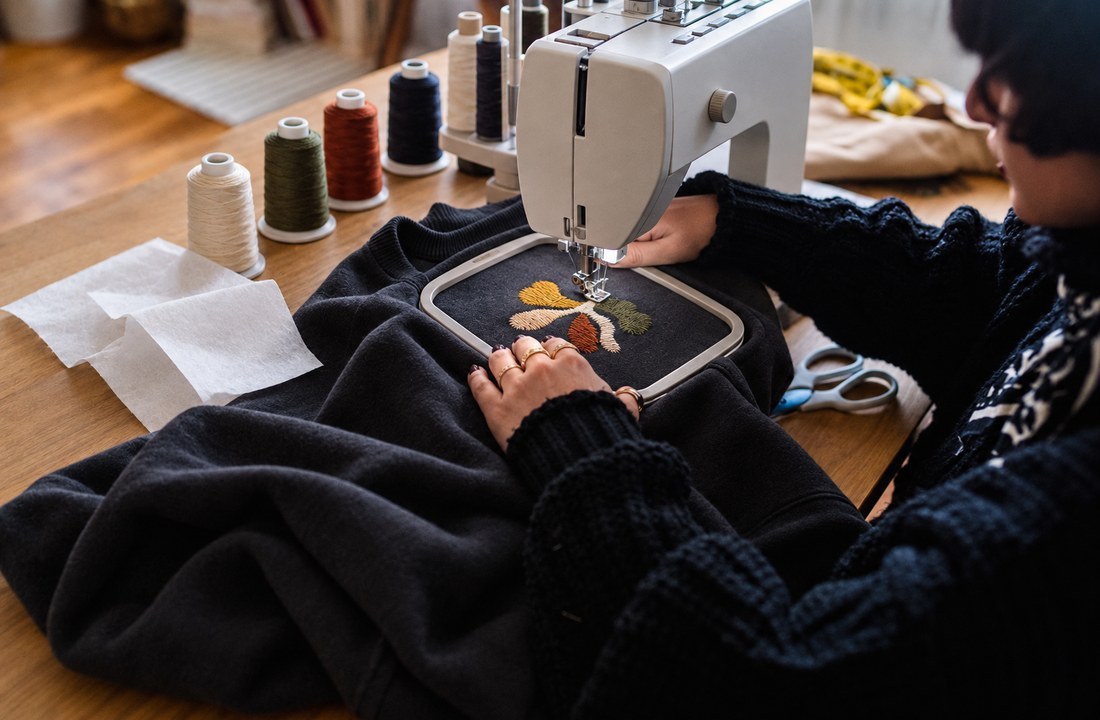
Balance support against comfort
Backing stabilizes the garment while stitches are formed and may continue supporting the design afterward. The correct type depends on fabric stability, stretch, design size, density and expected use. Madeira's embroidery backing guidance explains that cut-away, tear-away and other stabilizers serve different substrates and design needs. It is a technical reference, not proof of which product a supplier will use for one order.
For a stretchy sweatshirt knit, inspect both faces after stitching. The front should lie naturally without a puckered halo, pulled grain or sunken edges. On the reverse, backing should be trimmed cleanly where appropriate and should not leave sharp corners or excessive bulk against the body. If the logo looks clean only when the garment is stretched flat, it is not behaving correctly in wear.
Density cannot be judged by a headline number without the design and substrate. Filled areas, underlay, stitch direction, pull compensation, thread type and physical size interact. Ask the embroidery team to explain what was adjusted when the sew-out shows stiffness, gaps, edge distortion or thread breaks. The buyer's job is to approve the result and record the setup, not to prescribe a generic density copied from another garment.
Approve physical thread under controlled light
Choose thread from an actual card or stitched sample where color is important. Screen previews are affected by display settings, and thread reflectance changes with material, direction and light. Madeira notes in its thread color matching guidance that not every Pantone color has an exact thread match and that screen simulations may differ from physical standards.
The following sample matrix keeps visual preference tied to observable production evidence.
| Variable | Approve on the sample | Failure signal | Corrective direction |
|---|---|---|---|
| Fabric surface | Edges and small spaces remain readable | Stitches sink or the face texture breaks outlines | Simplify details, adjust support or change substrate |
| Stitch load | Panel retains intended drape | Stiff badge effect, pulling or fabric damage | Reduce filled area, revise digitizing or choose another method |
| Backing | Front lies flat and reverse is wearable | Puckering, shifting, rough edges or excess bulk | Reassess stabilizer, hooping and trimming |
| Thread color | Physical sample fits approved color range | Unexpected shift under relevant lighting | Select another thread or approve a documented tolerance |
| Placement | Mark is balanced across representative sizes | Logo crowds seam, rib or neckline | Move placement or create a size-group version |
Use the table to record a pass, revision or rejection for each variable. “Embroidery approved” is too broad if the buyer has not also approved the garment color, logo size and placement.
How Should Placement and the Reverse Side Be Checked?
Placement should be checked from stable garment reference points and on a worn sample, while the reverse side should be evaluated for comfort, backing finish and interaction with care labels or seams. A visually centered mark on a flat table can appear low, tilted or crowded once the sweatshirt is worn.
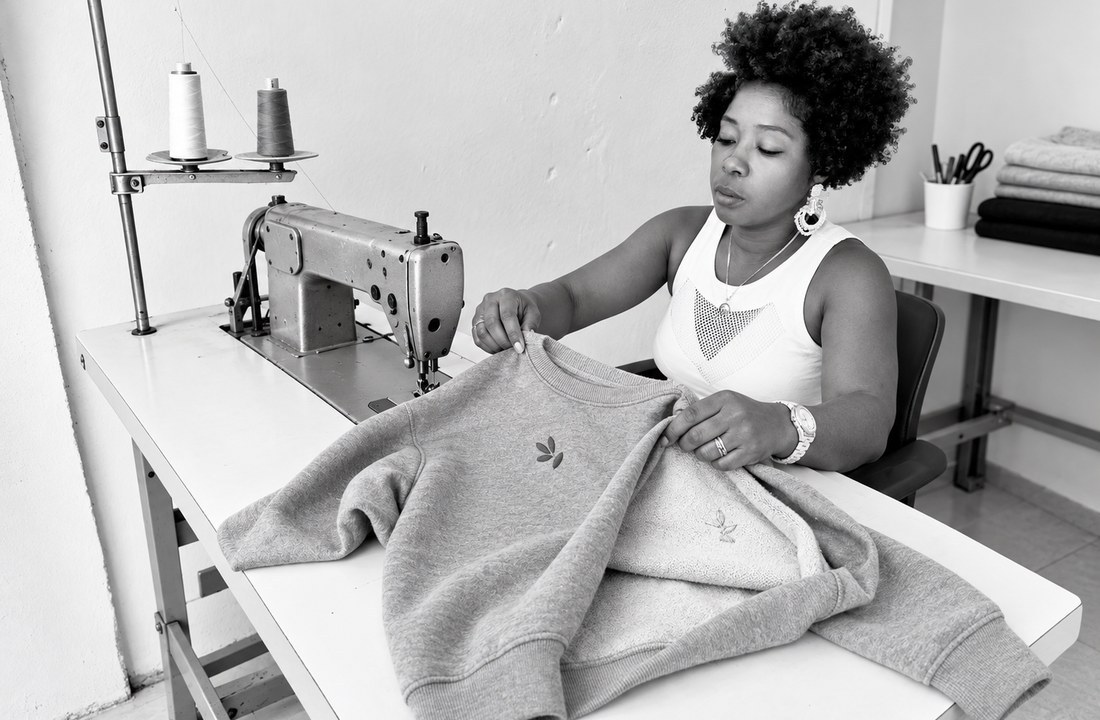
Inspect placement on the body and on the table
Define placement with physical measurements from agreed points, such as the neckline seam and center line, while recognizing that construction tolerances can affect the visual result. Photograph the sample flat and worn from the front, side and natural arm positions. For sleeve or cuff embroidery, check rotation as the arm moves. For a mark near a kangaroo pocket or rib band, confirm that the artwork does not look trapped between construction lines.
Fit changes placement perception. Dropped shoulders, mock necks, cropped bodies and oversized silhouettes do not share the same visual balance as a standard crewneck. Review at least the smallest and largest representative size when the available panel changes materially. If a single placement rule creates a poor result at one end of the range, create a documented size group or narrow the offered sizes.
Check alignment against garment grain and construction as well as the cutting-table position. A panel can be laid slightly off-square, making a correct measurement look visually crooked. State whether the approval prioritizes measured location, visual alignment or both, and agree on a realistic tolerance for production.
Make wearability part of approval
Turn the sample inside out. Check loose threads, backing edges, knots, exposed rough areas and whether the design covers or collides with existing labels. Wear the sweatshirt over the layer customers are likely to use. A reverse finish that feels acceptable over a T-shirt may irritate when worn next to skin.
Care behavior can change both panel shape and embroidery appearance. CottonWorks describes how shrinkage and skewing can result from fabric construction and processing variables. Follow the actual care label, document the method, and compare garment measurements and logo appearance before and after. Do not claim a universal wash-life result from a single home test.
If the embroidery remains flat but the garment panel changes shape, the product still may fail the buyer's fit requirement. If the garment holds shape but the design puckers, investigate backing, density, thread tension and digitizing. Separating those causes prevents the wrong corrective action, such as changing the sweatshirt when the setup was responsible.
How Should the Sample Govern Bulk and Reorders?
The approved sample should govern bulk and reorders through a versioned specification that identifies the garment, logo, thread, backing direction, placement and finishing checks. A photograph alone is not enough because lighting and scale can hide details, while a digitized file alone does not show the approved physical result.
Build the approval record
Record supplier style code, color, size, fabric description, artwork source file, embroidery file version, finished dimensions, placement measurements, thread brand or reference where relevant, approved color range, reverse-side finish and care-test conditions. Attach front, close-up, reverse and worn photographs. Note any accepted variation and any defect that requires production to stop.
Use the garment sample approval checklist as a starting framework, then add embroidery-specific checks. The sample should be signed or otherwise clearly accepted by the person authorized to approve product, not merely acknowledged by a coordinator.
Define change control. A different sweatshirt color can alter thread contrast and visibility. A new size can change perceived proportion. Another fabric lot, revised logo, different placement or alternative backing can affect the result. List which changes require a new sew-out and which can be confirmed with a smaller production check.
Inspect bulk against critical features
Prioritize wrong garment, wrong artwork, wrong thread color, missing embroidery, severe distortion and incorrect placement as critical identity failures. Then inspect workmanship issues such as loose threads, damaged fabric, inconsistent trimming and visible backing. Measure placement on a defined sample of the lot under an agreed inspection plan rather than checking only the top carton.
The current Custom Apparel page lists embroidery as an available method and shows a current page-specific minimum. That public listing does not verify the same setup for every sweatshirt. Ask Cloprod to confirm the exact garment, artwork, placement, quantity and timeline before ordering.
Set inspection responsibility before the lot arrives. The production team can check machine and workmanship conditions, but the buyer must define which logo details, placement references and color limits protect the brand identity. Agree on how a failed unit is recorded, whether affected cartons are held, and who decides on repair, replacement or acceptance. Without that route, a visible problem may be discussed in several messages while packing continues. A clear hold-and-release decision is especially important when sweatshirts are being divided among stores, employees or customer orders immediately after delivery.
For reorders, cite the approval record and ask whether the garment SKU, thread reference, digitized file and production route remain unchanged. If a substitution is proposed, do not accept “equivalent” without a new physical comparison. A close fabric weight or color name does not prove the same surface stability, fit or embroidery result.
Conclusion
A custom embroidered sweatshirt should be approved as one controlled combination of garment, digitized artwork and production setup. Evaluate the exact fabric surface, simplify the logo for its physical size, balance density and backing, confirm thread color in person, and judge placement on representative bodies and sizes. The reverse side and care behavior belong in the decision as much as the front appearance.
Before requesting a sample, send the sweatshirt SKU, colors and sizes, vector logo, intended physical dimensions, placement reference, thread-color target, quantity and delivery date. Ask the supplier to confirm garment compatibility, current embroidery conditions and what changes would require another sew-out. Cloprod can evaluate the project against its current catalog and service options, but the finished sample should remain the authority for bulk production and later reorders.
FAQ
Is a heavier sweatshirt always better for embroidery?
No. Added weight can provide body, but surface texture, stretch, knit construction, finish and panel design also matter. Approve the exact garment and artwork together; do not use GSM as a substitute for a sew-out.
Can the same embroidery file be used at several logo sizes?
Not automatically. Resizing can change stitch spacing, small details, underlay and overall load. Ask the digitizer to review each physical size and test it on the same sweatshirt fabric and thread.
What should be checked on the reverse side?
Inspect backing type and trimming, loose threads, knots, rough edges, excess bulk and interference with labels or seams. Evaluate comfort under the way the sweatshirt is likely to be worn.
Why does an embroidered logo pucker a sweatshirt?
Possible causes include unstable fabric, hooping movement, unsuitable backing, excessive or poorly directed stitches, thread tension and processing. The supplier should diagnose the actual sample before changing the garment or artwork.
When is printing more suitable than sweatshirt embroidery?
Printing may be more suitable when the design needs gradients, very fine detail, a broad image area or a softer large graphic. Embroidery can suit compact marks and textured effects, but only after the garment and stitch setup pass a physical sample.